At least I think it was chevre. I didn’t look that closely at the package.
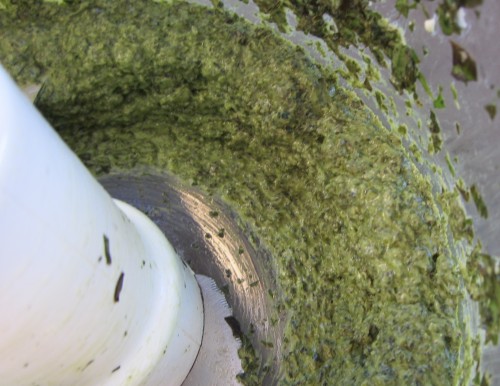
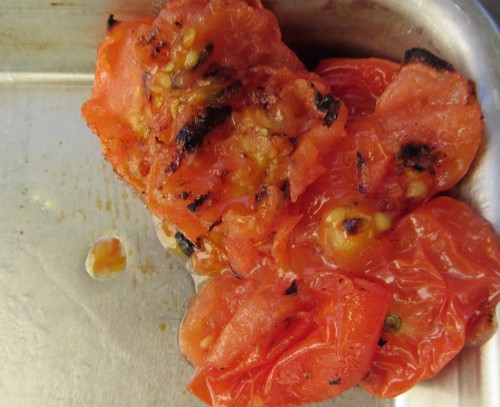
Basil, chevre, salt, and olive oil got buzzed in the food processor while the Glacier tomatoes roasted.
and
Roasted and mashed up with tongs.
The basil and tomatoes were taken from the Earthboxes. The dough was the standard “pizza dough” recipe. I didn’t milk the goat or anything, but it’s about as close as I can get to totally homemade.
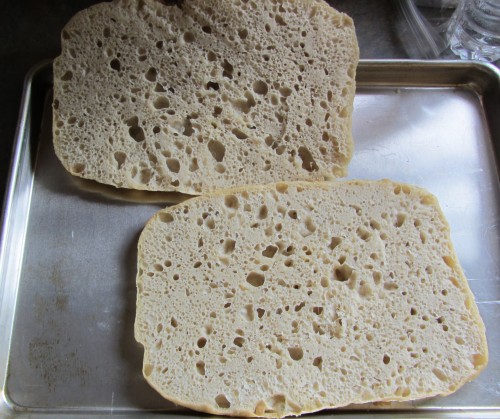
Making rustic breads is easy. Focaccia is even easier. The recent-high-school-graduate niece made the loaf below, with very little coaching.
This became one of two caprese sandwiches for GNOIF. (She made both breads.) Both of the breads were devoured in no time.
The ingredients are essentially the same as for the No Knead Bread, with extra-virgin olive oil added to the mix — 400 grams AP Flour, 300 grams water, 8 grams kosher salt, 1/4 tsp instant yeast, and 1-1/2 TBP olive oil. (75% hydration and 2% salt by weight. Most of the time I use the scale if it’s baking related. It’s just as fast as measuring cups and the results are way more consistent.)
Everything gets combined in the Kitchenaid and mixed on low speed with the paddle attachment for 8 minutes. Cover the dough with plastic wrap for 18-24 hours. The next day, line a sheet tray with parchment paper and add a light coat of extra virgin olive oil, about 1-2 tablespoons. Scrape the dough out onto the parchment and spread it out to near the corners of the tray. (It doesn’t have to be perfect, the dough will fix itself.) Let rise 1-1/2 to 2 hours until poofy. When the dough is almost ready to go, preheat the oven to 425 F. Spread about 2 tablespoons of oil over the top of the dough and dimple the top with your fingers. (Oiled fingers help keep the dough from sticking as much.) Place the tray in the oven and bake 22-25 minutes. Let cool in the tray.
We sliced this loaf width-wise. Both sides were lightly coated with basil pesto. (Yay Earthbox basil!) We splurged on heirloom tomatoes, which were “drained” and thinly sliced and chopped. The sandwich was finished with fresh mozzarella that had been thinly sliced and squished between paper towels until most of the moisture was pressed out.
Easy! I’m sure that one out of one nieces would agree.
Rose Levy Beranbaum’s Rosemary Focaccia Sheet from The Bread Bible. To quote:
This intriguing dough presents an apparent contradiction: it is incredibly light yet moist and satisfyingly chewy. Consider the percentage of water in this dough! In relation to the flour, it has 113.5 percent water, making it the highest percentage of any dough in this book. [ed: most doughs generally run 60-70 percent water as a percentage of the flour weight.] Who would have thought it even possible to make a dough this wet and still produce bread? And that is the secret of its incredible texture. The exceptionally high amount of water keeps the gluten in the flour from breaking down during the very long beating process. This enables the dough to develop into long stretchy strands that hold the air and give a chewy texture. It will remain a soupy batter until toward the very end the twenty-minute beating, when it suddenly metamorphoses into a shiny, smooth, incredibly elastic dough.
I adapted this recipe from my favorite neighborhood bakery, the Sullivan Street Bakery in New York City…
So yeah, that’s some great pedigree. I had four hours before I needed to be out the door, instead of the five hours called for the recipe, so I goosed the yeast a little and figured I’d sacrifice a bit of the flavor associated with the rising time — the bread was getting rosemary and a healthy amount of salt and olive oil anyway, so it seemed like a reasonable tradeoff.
The recipe (notes are in italics)
390 g AP Flour
3/8 tsp instant yeast (I increased this to 3/4 tsp)
442 g warm water
3/4 tsp each sugar and salt
36 g extra virgin olive oil
2 tsp rosemary, fresh
1/4 tsp sea salt or fleur de sel
Sheet pan
1. Mix the dough. In the mixer bowl, with the paddle attachment on low speed (#2 Kitchenaid), combine the flour and yeast. With the mixer running, gradually add the water, mixing just until the dough comes together, about 3 minutes. It will be very soupy. Increase the speed to medium (#4 Kitchenaid) and beat until the dough is transformed into a smooth, shiny ball, about 20 minutes. (This never happened, or at least it hadn’t after almost 30 minutes. It just stayed soupy. I wound up adding about 1/2 cup+ of flour so that the dough would cooperate. It was a humid day, which may have effected it somewhat. I added a tiny amount of salt and sugar to compensate for the added flour — otherwise it might have tasted “flat”.)
Add the sugar and salt and beat until they are well incorporated, about 3 minutes.
This went on for too long.
2. Let the dough rise. Lightly oil a bowl, cover and let rise for about four hours. (I did this directly in the Kitchenaid bowl. With the greater quantity of yeast that I used, this only took about 90 minutes.)
3. Shape the dough and let it rise. Coat the sheet pan with a heaping tablespoon of the olive oil. Pour the dough onto it. Spread the dough as thin as possible without tearing it. Let it rest 10 minutes, then stretch again. Cover the pan and let rise until doubled 1-1/2 to 2 hours. (I used another sheet pan upside down as a cover. Mine was ready after about 60 minutes. Typically I use parchment paper to make “unmolding” easier. As it turned out, this dough decided to completely cement itself to the tray. The unmolding was a hassle.)
4. Preheat the oven. Preheat the oven to 475 degrees F for 1 hour before baking. Have an oven shelf at the lowest level and place a baking stone or baking sheet on it before preheating. (Maybe I’m just too cheap… I let it preheat 30 minutes. I can’t believe that the oven will retain *that* much more heat if I let it go for an hour. I used a baking stone.)
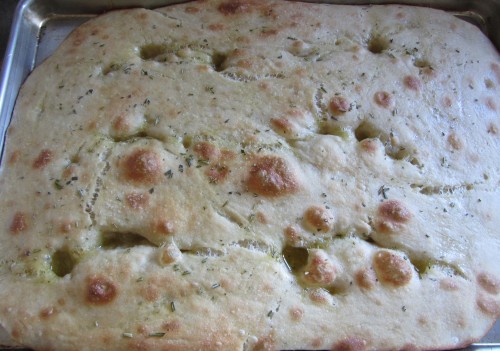
5. Sprinkle on toppings and bake. Uncover the dough and drizzle on the remaining olive oil. With oiled or wet fingertips deeply dimple the dough. Sprinkle evenly with the rosemary and salt. Place the pan directly on the hot stone or sheet tray and bake 12-13 minutes or until top is golden. Remove from oven and drizzle on a little extra olive oil if desired. (Mine was done at closer to 15 minutes.)
—
Other than resolutely sticking to the pan, it was a nice bread. I wouldn’t call the texture “incredible” like Beranbaum does, but for a fairly fast bread it was better than serviceable. The crust had a light chew to it. The crumb had an almost spongy, open texture, similar in appearance to the structure of a luffa. (Appetising, I know — I mean that in a nice way.) The hole size was very consistent throughout. (It really sucked up Iron Chef Leftovers’ terrific pig sauce.)
One reason I chose to try this bread, as close to the recipe as I had time for, was the 20 minute mixing time and super high hydration. Both of those parameters were well outside of what I make usually make. Normally I would try to minimize the oxidizing of the dough by not mixing for that long, but for this bread, it worked. I can see making this one again, though I’m sure the Kitchenaid won’t dig having to run for that long if I choose to make multiple breads for a crowd.
For a crowd, though, the Go To potato onion focaccia recipe is here.
If you are making burgers, meatloaf, sloppy joes, etc., there is something to be said for grinding your own meat. When you buy pre-ground meat, you never know exactly what it is composed of. Grinding it yourself eliminates the guesswork and makes for a better product. It is also much easier than you think it is – if you own a kitchen aid stand mixer, the grinder attachment runs about $50 and works really well. If you don’t, go to your local butcher (or even your local megamart if they have a butcher counter), buy the cut of meat that you want to grind and then ask them to do it for you. Trust me, it makes a difference.
Recently PW and her husband came over to the Iron Chef abode for dinner. I asked what protein they would like and I was told chicken burgers. I thought back to some chicken burgers I have had in the past – they were bland and dry and I wasn’t going to serve that. I then remembered back to a really good house-made chicken sausage that I had at a restaurant years’ ago and decided that would be the base for my recipe. I wanted something that was moist and flavorful but easy to make. This is what I came up with.
The key to this recipe is using freshly ground chicken thighs. You can probably use pre-ground chicken but you run the risk of the burgers drying out and will probably pay more per pound for the pre-ground meat than you will for the thighs. This recipe will make 4 good sized burgers, but can easily be scaled.
The Software
1 lb. boneless, skinless chicken thighs; ground
1 teaspoon minced sage
1 teaspoon minced rosemary
1 teaspoon minced oregano
1 teaspoon salt
1 teaspoon ground black pepper
1/3 cup apple, peel removed and diced into 1/8 inch pieces
½ large egg, lightly beaten
The Recipe
If grinding your own chicken, cut into 1 inch cubes and freeze for 10 minutes to firm up the meat before putting it into the grinder. Add all of the ingredients to a bowl and gently toss to combine. Divide the mixture into 4 equal parts and gently form into patties (you could make sliders and probably get 8 out of this recipe). Set on a plate, cover with plastic wrap and refrigerate for at least an hour (the burgers can be made in advance and kept in the fridge for 24 hour until ready to use). Preheat a skillet over medium-high heat and add a tablespoon of olive oil. When the oil is shimmering, add the burgers. Cook on the first side until a crust forms (about 4 minutes) and carefully flip. Reduce heat to medium and cook until the internal temperature reaches about 175 degrees (7-10 minutes, depending on your stove). Remove and serve to a hungry public.
Notes
The recipe can also be made on the grill. I would highly recommend starting these out on a cast iron skillet to form a bit of a crust before putting them on the grill surface – the burgers will seem loose and gravity will pull them through the grates of the grill initially. To check your seasonings, cook a very small amount of the mixture and cook it in a pre-heated skillet – it should cook in about a minute and this will tell you if you need to add anything seasoning wise. I used a Fuji apple for this, but you can use just about any apple you would like. It is important to use the apple – it helps to keep the chicken very moist. I suppose that you could use chicken breast for this, but you would run the risk of the meat drying out before it is done. I used fresh herbs when I made this dish, if you use dried, cut the amounts in half and test the seasonings – you can always add more but you can never take any away. This is a pretty mild tasting dish – if you want to ramp it up, some jalapeños or crushed red pepper would be really nice. Letting the formed patties sit in the fridge is important. If you don’t do it, they will fall apart when you cook them. You could freeze them and cook them later if you aren’t going to use the entire batch.
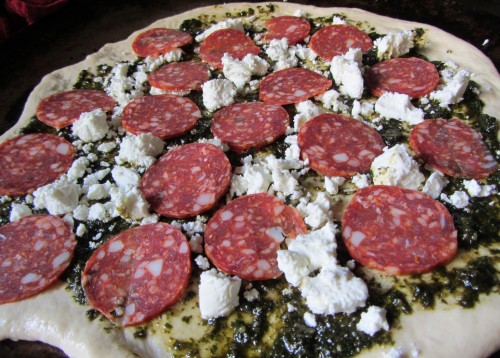
Last night’s pizza. 200g AP Flour, 65% hydration, 2% Salt, 3/4 tsp instant yeast, 1 tsp honey, 1 tsp EVOO. 2-1/2 hour rise at room temperature. Baked on a perforated pizza pan for 10 minutes at 500F.
No need for red sauce. The basil, goat cheese, and calabrese salami were tasty by themselves. The crust was cracker thin in the center, it had a nice crunch.
If I were to change anything on this one it would be to add even more pig.
Historically I’ve baked pizza for sixteen minutes at 500F. The process would be to bake the dough and toppings except cheese for ten minutes, then add the cheese and bake for another six. For years I had an ancient oven to work with that only went to 500F. These days all the cool kids are using short baking times, so…
This is the first attempt at a six minute pizza. That’s total cooking time. It’s not revolutionary, but it’s different from what I’ve been doing, so it may rate a few posts as I figure out what I think I’m doing.
This pizza uses my “normal” (Smitten Kitchen) recipe. After kneading the dough spent two hours on the counter, then overnight in the refrigerator, then two more hours on the counter to come up to room temperature. The toppings are simply red sauce, low-moisture mozzarella, and sauteed red onion.
I preheated the oven to 550F. While the oven was preheating I stretched out the dough by hand, placed it on a perforated pizza pan, then topped it.
Basil was added after it came out of the oven.
Overall the color was ok, the bottom turned fairly brown.
Things to try going forward will include using a pizza stone, with or without the pan. The broiler may factor into things as well.
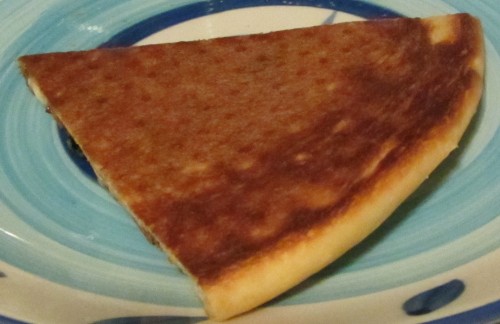
1. I made this pizza a few days before I went to Zeek’s pizza. It’s puffy in places, which is why it burned a little bit:
The Zeek’s people had a longish lightweight crowbar looking thing that they were using to punch down the “puffs” as they cropped up. It seemed like they had the doors to the ovens open quite a bit while doing they were busy punching the dough down. I wonder what temperature the pizzas were actually cooking at.
2. Far and away the most symmetrical No Knead Bread I’ve ever made:
Purely by accident of course.
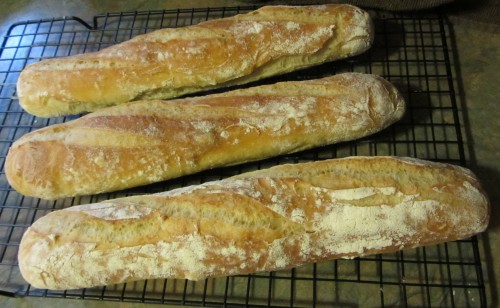
3. More baguette experiments. I’m still not getting loaves that are as attractive as I’d like, though I feel I’m on the right track:
The “right” answer seems to be to visualize the dough with two imaginary lines running lengthwise along it, dividing it into 3rds. The slashing needs to all happen within the middle 3rd.
4. A basket that was purchased for transporting bread. It was a little small for the purpose, and somebody had other ideas as to its intended use:
5. Who knew a Sham-Wow let to dry on the edge of the tub could be so comfortable?