This page is intended to make it easier to find out about No Knead Bread. Posts on the subject are scattered all around FlatbreadGarden. The text on this page is largely copied and pasted from other posts on the website.
1. Introduction:
To quote Jim Lahey’s website:
In November of 2006, Lahey’s no-knead method drew the attention of “The Minimalist” columnist Mark Bittman. His articles about it in the New York Times sparked a worldwide home baking revolution.
Or, as Mark Bittman said:
I set up a time to visit Mr. Lahey, and we baked together, and the only bad news is that you cannot put your 4-year-old to work producing bread for you. The method is complicated enough that you would need a very ambitious 8-year-old. But the results are indeed fantastic.
Mr. Lahey’s method is striking on several levels. It requires no kneading. (Repeat: none.) It uses no special ingredients, equipment or techniques. It takes very little effort.
Bittman again:
The loaf is incredible, a fine-bakery quality, European-style boule that is produced more easily than by any other technique I’ve used, and will blow your mind.
2. The Recipe:
The recipe is here. The Minimalist column is here. I would highly recommend reading the Minimalist column in addition to the recipe. It has some good insights on bread baking in general:
Adapted from Jim Lahey, Sullivan Street Bakery
Time: About 1½ hours plus 14 to 20 hours’ rising3 cups all-purpose or bread flour, more for dusting
¼ teaspoon instant yeast
1¼ teaspoons salt
Cornmeal or wheat bran as needed.1. In a large bowl combine flour, yeast and salt. Add 1 5/8 cups water, and stir until blended; dough will be shaggy and sticky. Cover bowl with plastic wrap. Let dough rest at least 12 hours, preferably about 18, at warm room temperature, about 70 degrees.
2. Dough is ready when its surface is dotted with bubbles. Lightly flour a work surface and place dough on it; sprinkle it with a little more flour and fold it over on itself once or twice. Cover loosely with plastic wrap and let rest about 15 minutes.
3. Using just enough flour to keep dough from sticking to work surface or to your fingers, gently and quickly shape dough into a ball. Generously coat a cotton towel (not terry cloth) with flour, wheat bran or cornmeal; put dough seam side down on towel and dust with more flour, bran or cornmeal. Cover with another cotton towel and let rise for about 2 hours. When it is ready, dough will be more than double in size and will not readily spring back when poked with a finger.
4. At least a half-hour before dough is ready, heat oven to 450 degrees. Put a 6- to 8-quart heavy covered pot (cast iron, enamel, Pyrex or ceramic) in oven as it heats. When dough is ready, carefully remove pot from oven. Slide your hand under towel and turn dough over into pot, seam side up; it may look like a mess, but that is O.K. Shake pan once or twice if dough is unevenly distributed; it will straighten out as it bakes. Cover with lid and bake 30 minutes, then remove lid and bake another 15 to 30 minutes, until loaf is beautifully browned. Cool on a rack.
Yield: One 1½-pound loaf.
3. My Version Of The Recipe:
I use weights:
Ingredient Measure Baker’s % AP Flour 400g Water 300g 75 Salt 8g 2 Instant Yeast ¼ tsp 1. Combine all ingredients in a large bowl. Let dough rest at least 18 hours, at warm room temperature, about 70 degrees.
2. Dough is ready when its surface is dotted with bubbles. Spray a light coating of oil onto a Silpat (or other flat surface, the Silpat is relatively non-stick and easy to clean.) Lightly dust the surface with flour. Stretch and fold the dough four times, pulling once from each cardinal direction. Cover with a bowl and let rest 15 minutes.
3. Lightly coat a large bowl with oil, then flour. [2017 tweak: Use no gluten rice flour instead of wheat flour. Flour does not contain gluten and the dough will release much more easily from the bowl.] Gently and quickly shape dough into a ball. Put dough seam side down into the bowl. Cover with a shower cap/plastic and let rise for 2 hours. When it is ready, dough will be more than double in size and will not readily spring back when poked with a finger.
4. At least 15 minutes before dough is ready, heat oven to 450 degrees. (30 minutes is even better.) [2017 tweak: 460F and a minimum of 30-minute preheat, ideally up to an hour.] Put a 4-1/2 to 7-quart heavy covered pot (cast iron, enamel, Pyrex or ceramic) in oven as it heats. When dough is ready, carefully remove pot from oven. [I’ll often leave the pot in the oven for this step. It’s somewhat dicier.] Invert the bowl over the pot until the dough plops out. Shake pan once or twice if dough is unevenly distributed; [2017 tweak: Carefully try to slash the dough, it seems to help get a larger and more consistent oven spring.] the dough will straighten out as it bakes. Cover with lid and bake 20 minutes, then remove lid and bake another 20-22 minutes, until loaf is beautifully browned. Cool on a rack.
4. Notes:
A) I use weights for all bread baking. It’s way more precise, and it makes the results way more predictable. Highly highly highly recommended. I think that our scale may be an older version of this. Also- measure in grams. Imperial measurement conversions are for suckers.
B) I use a shower cap to cover the bowl. No fiddling with plastic wrap, and it’s reusable. The shower cap was about $2 at Walgreens.
C) It’s an 18 hour initial rise, then the dough is folded and allowed to rest for 15 minutes, followed by a 2 hour final rise. Allowing time for cooling, the process needs to be started about 21 hours before the bread is ready for serving. So, if dinner will be at 6pm tomorrow night then the dough needs to started at 9pm the night before. In the future I’m just going to use the “Eastern Time Zone” automatic translation that goes on in my head for sports start times.
D) The recipe calls for a 6-8 quart dutch oven. Later versions of the recipe call for a 5 quart dutch oven. I most commonly use either 4-1/2 or 7 quart dutch ovens. The smaller dutch oven with make a more upright loaf with better “rise”. They’re both good though.
E) The recipe calls for 30 minutes covered, plus 15-30 minutes uncovered. I bake it for 20 minutes covered, then 20-22 minutes uncovered. This bread doesn’t need an hour, at least not in our oven.
5. Internal Links:
Links to previous CSE posts as of August 29, 2014:
No Knead Bread — What Happens When It’s Slashed
Bittman – Lahey No Knead Bread: The 3rd Times The Charm? (No pics. Includes a breakdown of the steps to the recipe and what I was trying at the time.)
Bittman – Lahey No Knead Bread (The first attempt from 2011. No pics.)
6. Images:

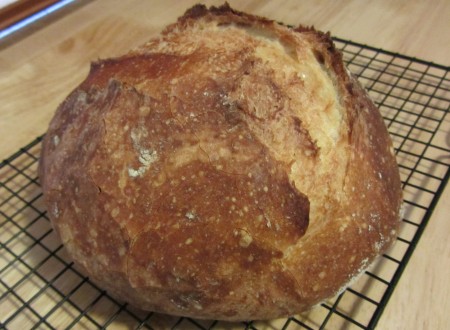
An early example. I was using a lot more flour then:

Two more early breads:
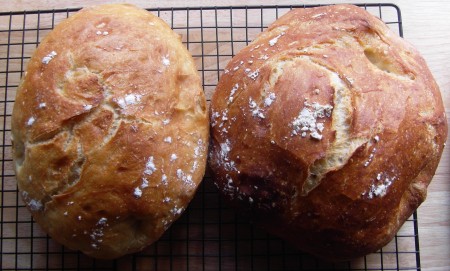
Two recent versions. Baked at the same time. The “tighter” one (right) was done in a 4-1/2 quart, the “looser” was in the 7 quart:

Very symmetrical and fairly compact:

And my favorite picture of these two:


do you still use AP or have you moved to bread flour
LikeLike
I still use AP, though much of the time I use bread flour. When treated the same, bread flour will get darker with a crustier exterior, which tends to be more popular with our group of friends.
LikeLike