Container Garden Update — June 4, 2023

A few pictures of the garden in early June. North of Seattle that means that we’re still a month or more away from the first real harvests.

The first picture is an overview from the “front” , facing east.

Front Left – tomatoes (indeterminates are on the north/left, determinates in the front).

Front Right – Carmen peppers.

Back Left – Fortex beans and Tromboncino zuchinni.

Back Center – basil (hiding) and cucumber trellis.

Facing north:

Close-up of the Tromboncino zucchini. The Fortex beans are in the background:

The Marketmore cucumbers:

The Joi Choi. Planted on April 6, the bigger plants are ready to harvest. The tulle over the wire hoops seems to have kept the bugs out this time:

The frilly cilantro and dill that was planted on March 20. They’re sitting in a place where they get morning sun, then dappled sun after that. I think they’re going to bolt within the next two weeks regardless of care:

One nice thing about planting in pots is that they can be moved around depending upon the season and the demands of what’s been planted. The next picture has young leaf lettuce that is covered by bird netting. We have lots of squirrels and they’ll destroy any seedlings that aren’t protected from digging:

I’m still getting the hang of succession planting. I think I’m always waiting too long between plantings, and I try to start outdoors when it’s still cold and the cold nearly stops any growth or germination. This year I tried planting lettuce outside in early March and the it didn’t germinate at all, though that could have been because the seeds were a few years old. I think that I may need to start in February/March indoors, then move that group out into the cold frame in a “warm” spot, then continue with a new group every two weeks through April.

It sounds good in theory anyway.

Pigs In A Blanket

Pigs In A Blanket, using a slightly modified pizza dough recipe for the blanket:

The dough:  250 grams AP flour, 150 grams water (60% hydration by flour weight), 5 grams honey (2%), 30 grams olive oil (10%), 5 grams kosher salt (2%), 1 teaspoon instant yeast.

Mix for 8 minutes on low speed.

Cover and let rise one hour.

My four hot dogs were 6″ long, so I rolled the dough into a rectangle 24″ long. Lay the hotdogs lengthwise into the rectangle, roll them up, then cut the hot dogs into quarters. I used a serrated knife and a light touch.

Set the Pigs In A Blanket on end in a Silpat-lined baking sheet, cover with an inverted baking sheet, and let rise one hour.

Note:  I set them on end because I thought it would allow the dough to rise more evenly around the hot dogs. What wound up happening in reality is that the dough slumped down around the hot dogs and only part of that height was regained with baking oven spring. For more traditional Pigs In A Blanket the hot dogs should be laid on their sides. (However, the rise was nice and even around the hot dogs, so that was good.)

Preheat the oven and bake at 375F for 15-20 minutes or until lightly golden and the dough gives resistance when poked.

Thoughts:

Basically every recipe online calls for opening a can of dough, cutting the dough into triangles, wrapping that around the protein, then baking for 12-15 minutes. And that’s fine. I think comparing the total hands-on time between “the can” and “from scratch” it’s not dramatically different. Assembling the ingredients from scratch takes an extra few minutes but by the time we’ve fiddled around with wrapping hot dogs in dough — what’s an extra five minutes or so?

As with all Pigs In A Blanket, these were devoured in short order.

Previous Pigs In A Blanket post here.

An Italian Tomato Pie – Pizza – Focaccia Made With Fresh Milled Wheat

A weeknight dinner pizza loosely in the style of an Italian Tomato Pie / Focaccia:

Topped with cupping pepperoni, goat cheese, and a red sauce made from our garden’s tomato sauce, basil, and oregano. The dough was very airy and light with mostly small holes in the crumb. It was baked on a sheet tray with lightly oiled parchment paper, so the bottom got a nice crispiness. The top had just a little crunch too. It was definitely rustic.

The Ingredients:

400 grams AP flour. 100 grams Hard White Winter Wheat flour (milled in our Mockmill). 500 grams flour total.

315 grams room temperature water (baker’s percentage 63% hydration)

15 grams honey (3%)

15 grams extra virgin olive oil (3%)

10 grams kosher salt (2%)

2 teaspoons instant yeast (not rapid rise)

The Handling:

Combine all ingredients and mix on low speed for 6 minutes.

Briefly finish kneading and shaping the dough into a ball.

Lightly coat a bowl with oil, cover and let rise 45 minutes.

Stretch and fold the dough, re-form into a ball, cover and let rise another 45 minutes.

Line a sheet tray with parchment and lightly oil the surface of the parchment. Transfer the dough to the parchment and lightly stretch it out, leaving it 1/2 inch to 1 inch thick. 500 grams of flour won’t stretch all the way to the edges of the sheet tray and that’s ok.

Dimple the dough all over with your fingertips. Turn on the the oven to 450F. Cover and let rise one hour.

Top with the tomato sauce and pepperoni. Bake at 450F for 15-18 minutes, or until the top begins to brown and the dough feels like it’s near baked when tapped. It will feel somewhat rigid and hollow. Top with the goat cheese and cook another 3-5 minutes.

Let the pizza rest, then cut into squares.

Thoughts:

If the bottom had cooked any further than it did it would have been overcooked. Adding an extra sheet tray to the bottom half-way through the bake likely would have created a slightly less “done” result. It’s something to keep an eye out for next time.

For an improvised dough, the finished product came out pretty much like what I’d visualized, so I was happy with that. It was very rustic but light at the same time. There were just enough toppings to make it interesting but not so many that the dough didn’t shine through.

One nice thing about using white wheat berries is that they don’t announce themselves like red wheat berries do. It’s more of a subtle backstory that adds depth and “what is that flavor?”

At some point I’ll need to try a 2-3 day cold ferment instead of the weeknight-gotta-get-dinner-on-the-table room temperature approach.

Overall it was somewhat unusual and definitely enjoyable. Win.

The Hellebore

Today was going to be a few pictures of the lettuces and their new setup. The weather has had other ideas — it’s been cool or cold most of the last two weeks and the lettuces are refusing to germinate. Instead, a few pictures of the hellebores that live in the southwest corner of the backyard.

While I was buying potting soil at the big box store I saw these on the clearance rack at about 1/4 the normal retail price. I picked up three. It’s been wet but not super-duper cold. They’re recovering well from the neglect:

The biggest and longest-established:

I’m always a fan of “droopy” flowers:

Finally, one of the relatively newer plants that we’re really fond of. It’s the one variety where I know the name — “Silver Prince”:

The evergreen trees above and and around the hellebores mostly live not in our yard. The neighbors decided to clean up some of the low-hanging branches, so the hellebores should see more sun and (rain) water going forward. They’ve been slow to grow but I’m hopeful they’ll start doing better with a little attention in the form of compost or fertilizer and possibly some mulch to help retain water in July and August.

New Seeds For The Garden

The new seeds for 2023:
JOI CHOI × 1
SEED / 1 gram
RED BARON × 1
SEED / 1/2 gram
SIMPSON ELITE LETTUCE × 1
ORGANIC SEED / 1/2 gram
ITALIENISCHER LETTUCE × 1
ORGANIC SEED / 1/2 gram
HEAT TOLERANT LETTUCE MIX × 1
ORGANIC SEED / 4 grams
SWEET BASIL × 1
SEED / 1/2 gram
DILL, DUKAT × 1
SEED / 2 grams
CONFETTI CORIANDER × 1
SEED / 1 gram
CRUISER CORIANDER× 1
SEED / 1 gram

It’s mostly fill-in for what’s been used up over the last few years. Looking at the weights, it’s a lot smaller quantities per variety than we’ve historically purchased. In retrospect it might have been better to buy some larger amounts.

For some other things, we’ve been setting a few aside and drying the pods — Fortex beans, Rattlesnake beans, and Super Sugar Snap peas, and replanting with “seeds” from the previous year. We also let some cross-section of the Guardsman bunch onions (scallions) go to seed so those are self-sustaining as well. We used to have Red Barons but I must have failed to propagate those, so more are on the way.

We’ve tried Bok Choi and Pak Choi in the past and those always got wiped out by bugs. We’ve tried row covers and organic pest solutions and neither really helped. I see other people succeeding so it must be possible. It’s worth a cheap try.

I’m going to hang some of the heat-averse herbs and lettuces in planters under the west-facing edge of the 2nd story deck, both to avoid the worst of the sun, and to keep squirrels from digging everything up. If at the end of the summer I feel smarter than the squirrels then it’ll be a win. I may add shade cloth around or over the hanging planters, though that might be too much shade in total. I’m always trying to increase our yield on lettuces and “under the edge of the deck” is one more thing to try.

Now that I think about it — Maybe under the north-facing side of the deck would work better. No direct hot sun during the day.

A “Sampler” Heirloom Wheat Loaf

We had company over last night for board games. I baked a loaf of heirloom wheats so that everyone could try and compare the varieties side by side:

(L-R) Red Fife, Rogue de Bordeaux, Turkey Red, Sonora White

I decided on a combination loaf because I thought that would be easy to bake into a reasonably good and consistent result and it would eliminate variables that could happen if I baked all four little breads individually. The sections tasted distinctive, which was my one concern going in.

I started by milling 150 grams of each wheat berry. (Each process repeats four times, once for each variety.) I then combined in a tupperware 100 grams of a flour variety with 100 grams of cold water and a faint pinch of yeast as a poolish. I put the “extra” 50 grams of flour into another tupperware. I refrigerated both overnight then pulled them out in the morning to warm up.

In the morning I added the reserved 50 grams of flour to the poolish along with 3 grams of kosher salt (2% salt as a percentage of flour weight) and 1/2 teaspoon of Instant (not Rapid-Rise) yeast. Mix all to combine thoroughly, cover, and let sit one hour. Form the doughs into oblong disks so that all four will fit side-by-side in a 9″ x 5″ baking pan. Cover. Let rise another 90 minutes, then bake at 450F for 30-35 minutes.

They were definitely distinctive. The Rougue de Bordeaux tastes of cinnamon and spices. The Red Fife is less spicy but also sweeter. The Turkey Red was described as “meaty” or “bold”. The Sonora White is mild by comparison and it’s really intended more for tortillas, but it was a good contrast to the other red wheats.

It was fun introducing people to bread like they’d never experienced. I think next time it’ll be four (or just two) full-sized loaves — two loaves would be way less fiddly and people could literally stick their nose in to smell the aromas.

Herbed Focaccia With Poolish

One of our holiday traditions is attending a pot luck / lasagna party hosted by a good friend of ours. I’ll typically make some sort of bread. (Search the bottom of the webpage for “epi”, “focaccia” or “fougasse” for some examples.) This year it was a festive herbed focaccia created using a room-temperature overnight poolish as the base:

One day ahead I started the poolish: 800 grams of bread flour. 800 grams cool water. A few grains of Instant (not fast-acting) Dry Yeast, about 1/16 teaspoon. Mix thoroughly, cover tightly, and let sit on the counter overnight.

The next steps need to start at least 6-8 hours before consumption. Most of it is hands-off, but all up it comes out to over four hours of preparation + cooling.

In the bowl of a stand mixer combine 200 grams of bread flour, 2 teaspoons of Instant Dry Yeast, 30 grams olive oil, 20 grams kosher salt. Mix that briefly then add the poolish and mix on low speed for 8 minutes. Cover.

The total baker’s percentage formula comes out to 1000g flour, 800 grams water (80% hydration), 30 grams olive oil (3% of the flour weight), 20 grams kosher salt (2% of the flour weight), yeast.

Bulk rise until doubled in volume – this will take 1 – 2+ hours depending upon the temperature of the house.

Once doubled transfer the dough to a parchment-lined-and-oiled 18 x 13 sheet tray.

Lightly coat the top of the dough with olive oil.

Using your fingers, poke the dough all over down to the base.

Sprinkle on fresh herbs of your choice. I used rosemary and thyme from our raised garden beds. Which were buried under snow, so that took a couple of extra minutes to pick through for good stuff.

Cover the dough and start the oven preheating to 450F.

Let rise one hour. Sprinkle the dough with flakey (Maldon’s) salt.

Bake for 25-35 minutes or until the internal temperature is at least 200F and the bread is pleasantly browned.

Another cell phone pic taken at the event. I cut it into squares to make self-serving easy.

Notes:

I accidently let the bulk rise much more than double. Between that and the starter poolish the dough was extremely loose and extensible. I sort of had to wrestle it into shape using a generous amount of oil to keep it from sticking to everything. Given a more correct rise time the dough should have been much more manageable.

I liked the festive appearance and the focaccia got nice feedback. I can see making this one again, though I think I may use a biga next time with the idea that it may make the dough more manageable in the shaping stage.

Bonus No Knead pic:

Naan For A Dinner Party

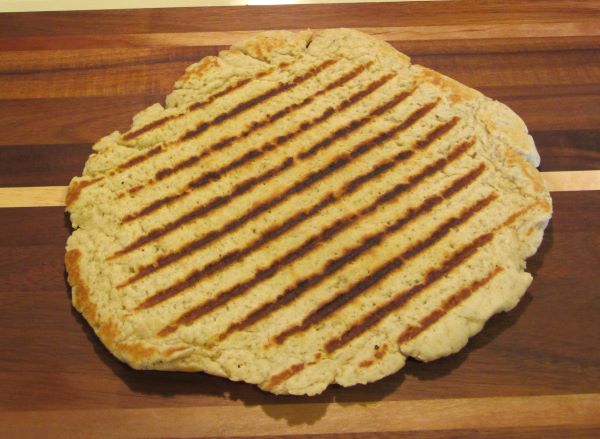
We were recently invited to a dinner party that involved dishes from a variety of cultures and places, sort of focused on North Africa and the Fertile Crescent. We brought naan. Pictured is a triple recipe to generously serve ten people:

The white girl kitty inspecting the naan.

I’ve made naan or naan-like things a number of times and basically winged it with decent-to-good results. This bake was for a discerning crowd so I wanted to use an actual recipe as a starting point to help ensure things didn’t go too far off the rails.

Ultimately I chose between Kenji’s Grilled Naan recipe on Serious Eats and a King Arthur website recipe. Kenji’s recipe calls for using an outdoor grill, so I mostly went with the King Arthur recipe because we were cooking on a grill pan instead of live fire. I used Kenji’s recommendation of bread flour instead of a mix of flours.

First, the King Arthur formula as written:

180g King Arthur AP Flour, 90g King Arthur Bread Flour, 142g warm water, 71g Full-Fat Greek Yogurt, 28g melted ghee or butter, 1-1/2 teaspoons Active Instant Dry Yeast, 1 teaspoon granulated sugar, 1 teaspoon salt. Full recipe here. …After baking brush with butter and top with nigella seeds and cilantro.

My slight modification that includes honey and uses Baker’s Percentages:

270g King Arthur Bread Flour, 142g warm water (52% of flour weight), 71g Full-Fat Greek Yogurt (26%), 28g melted ghee (10%), 1-1/2 teaspoons Active Instant Dry Yeast, 2/3 teaspoon honey, 5g (scant 2%) salt. Combine all in a mixer for 6 minutes on low speed.

  1. Cover and let rise until doubled, about 60 minutes.
  2. Divide into ~100g balls. (The original recipe calls for 65g, which I felt were too small for that event.) Let the dough balls rest 20-30 minutes.
  3. Preheat grill pan to medium/medium-high.
  4. Very lightly oil a work surface roll out a dough ball to 8-10″ long. Then roll the next ball as the one on the stove is cooking. Resist the urge to roll out very thinly — the center may burn instead of bubbling.
  5. Bake the first side about 45 seconds — until it the dough bubbles, then flip and bake another 45 seconds or until the naan is just cooked through. (Cooking them too long makes them tough.)
  6. After baking brush with ghee and top with minced chives.

For transport we put a cooling rack on the bottom of a sheet tray, then piled on layers of naan with each level separated by parchment paper. We wrapped the entire thing in foil. Shortly before dinner the naan was reheated in a low oven while still wrapped in the foil.

Thoughts:

I’d never made ghee, but it’s super easy. There are tons of recipes online but basically you just heat butter until warm/very warm, skim the surface until the solids drop out, strain. Done. We heated a couple of smashed garlic cloves in the finished ghee for a little background sense of garlic.

The naan was well received at dinner, so that part went well. I think the King Arthur recipe calls for too much liquid — I wound up adding a few tablespoons of flour and then a pinch of salt to keep the balance. If I had it to do over again I would have held back about 1/3 of the water initially to see how the dough shaped up.

I sort of feel like that’s not-uncommon in bread baking and recipe writing — too much liquid in the formula that then combines with generous amounts of bench flour to compensate. As a rule I try to do the opposite and incorporate as little raw flour as possible, which then also helps maintain the balance of the recipe. That’s why in Step #4 it calls for a lightly oiled surface, rather than floured or heavily floured.

Ten people ate twelve of the fifteen naan. Little or No Leftovers = Successful Recipe. I’ll use this one again.

Weeknight Pizza Thoughts

An easy weeknight pizza with tomato sauce, pepperoni, and mozzarella:

The formula: 350 grams AP flour, 220 grams room temperature water (63% hydration), 11 grams honey (3% by weight), 11 grams olive oil (3% by weight), 7 grams kosher salt (2% by weight). 1.5 teaspoons instant dry yeast.

The steps: Mix at low speed for 8 minutes or until smooth. Coat a bowl lightly with oil (it only takes a teaspoon or a little more). Ball the dough and swush it around in the bowl to coat. Cover. Let rise one hour, then fold the dough 2-4 times and cover.

Place a baking stone onto the oven – middle rack. Preheat the oven to 500F.

Let rise another 90 minutes then remove to a lightly oiled workspace. Gently stretch the dough into a circle, taking care not to smash the outer rim. Dimple the center all over with your fingertips. Transfer the dough to a screen or pizza peel. Top with the tomato sauce and pepperoni.

Bake for 8 minutes. Top with the mozzarella and bake for another 3-5 minutes until melted.

Other thoughts:

Our weeknight pizzas are 12-14″ in diameter. For crackery thin crusts we use 300 grams of flour. For “poofy” style pizzas we use 400 grams of flour. Today’s pizza was 350 grams and it was more poofy than crackery.

Today’s pizza was made with AP flour. Most of the time we’re using bread flour for pizzas. Either of those will work for this pizza, we just happen to have more AP flour in the pantry, so..

We also did a taste test of two (supermarket available) low moisture whole milk mozzarellas. It was Belgioioso vs Galbani. We baked a cheese-only pizza with equal amounts of the cheeses on each half of the pie for the test. The consensus was that they’re pretty even. I felt like maybe the Galbani tasted slightly creamier/milkier, but I don’t know that I could tell the difference in a blind test.

Day Of The Dead Focaccia

A simple focaccia for a Day Of The Dead Party-

The topping is olive oil, zaatar, and Maldon Sea Salt Flakes.

The hydration is 75%, which is not on the high end for a focaccia — the dough is sticky but can be handled with wet or oiled hands.

The formula:

  1. 800 grams King Arthur Bread Flour, 600 grams cold water, 16 grams kosher salt, 2 teaspoons Instant (not rapid-rise) yeast.
  2. Mix the dough for 8 minutes on low speed, then cover and move to the refrigerator for 2-3 days. The refrigerator step can be skipped if crunched for time, though the focaccia will taste better after an extended cold fermentation.
  3. Remove from the refrigerator at least 4-5 hours before you intend to serve the bread.
  4. As the dough returns to room temperature: About every 30 minutes to one hour work around the bowl, lift the dough from the sides and push/drop the dough back towards the center, taking care not to pull so hard that the dough tears.
  5. When the dough is near room temperature remove it from the bowl and place it on a baking sheet lined with oil-coated parchment paper. 3-4 tablespoons of olive oil should be plenty to coat the parchment. Spread out the dough without tearing it into a round/oval shape towards the edges of the sheet tray. If the dough fights back wait five minutes and try again.
  6. Cover (I use another inverted sheet tray) and let rise one hour. If using zaatar mix 4 tablespoons with 4 tablespoons olive oil and let it rest and hydrate.
  7. Preheat the oven to 425F. Using the tips of your fingers, dimple the dough all over, pushing down to the sheet tray. Spread a liberal amount of olive oil over the top, then top with the zaatar and a “healthy” sprinkle of flake salt. Cover and let rise one hour.
  8. Bake for 30-35 minutes at 425F, then remove to a cooling rack, taking care not to spill any residual oil on yourself or other things you’re attached to. If during baking the bottom of the dough is getting too dark add a second sheet tray underneath the first. For this bake I used two sheet trays for the entire time.

The focaccia was served at a friend’s house with a Day of the Dead menu and beer theme and the bread was a big hit — the zaatar “face” motif didn’t last very long. This focaccia would also be good if substituting other herbs or cheese for the zaatar — I was targeting a sort of scary pumpkin face sort of thing, and zaatar tastes good and stands up to other strong flavors which made it a good choice for this event.

I’ve made many focaccias and I’ve come the the conclusion that the most important element is patience. The bread will be fine without the long refrigerator rise or extra folds and multiple rises, but I think the end result is better when it isn’t rushed. Because this was a weeknight bread I brought the dough to work and stored it in the refrigerator there, then removed it around to my desk at 2:30pm to start warming up for a 7:00 dinner. Many recipes will call for “one hour out of the refrigerator then proceed…” , but that never seems like enough time for the dough to warm up to room temperature and the later rises don’t wind up very satisfactory. Give it time.