I’ve now reached a point with the weekly sandwich bread bake that I’m basically happy with it. I’m sure I’ll continue to fiddle with it to see how it reacts, but here’s where I’ve settled as a base recipe:
Ingredients
100g starter discard or overnight poolish (either of these are optional but they seem to improve the mouthfeel of the finished bread). The starter discard is 50g bread flour and 50g water. If using a poolish it will be 50g bread flour, 50g water, and a tiny tiny pinch of yeast.
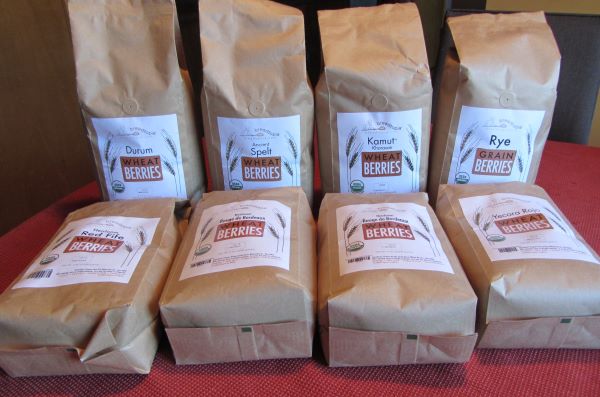
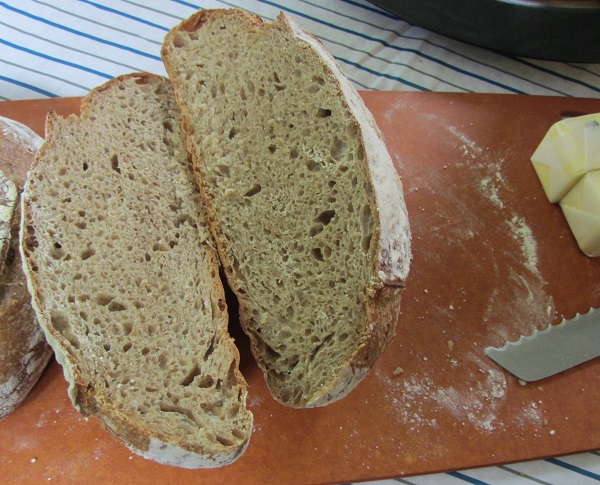
200g Bread flour and 250g fresh-milled whole wheat flour (Red Fife, Turkey Red, or Rogue de Bordeaux berries), (In total it is 500g flour weight total including the starter/poolish).
325g cool water (with the 50 grams from the starter/poolish the total water is 375 total grams. 75% dough hydration).
15g honey (3% of flour weight)
15g olive oil (3% of flour weight)
10g kosher salt (2% of the flour weight)
1.5 tsp instant (not rapid-rise) yeast.
Process
Start by adding the 325 grams of cool water to the bowl of the stand mixer.
Scoop 100 grams of starter discard into the water.
Grind the wheat directly into the water/starter mixture. I feel like this helps keep the milled wheat temperature lower than it would be if I just milled it into an empty container. At the very least, it can’t hurt.
Add the remaining ingredients and mix for one minute to combine. Cover and let rest 20 minutes, up to an hour. Uncover and mix another 6 minutes.
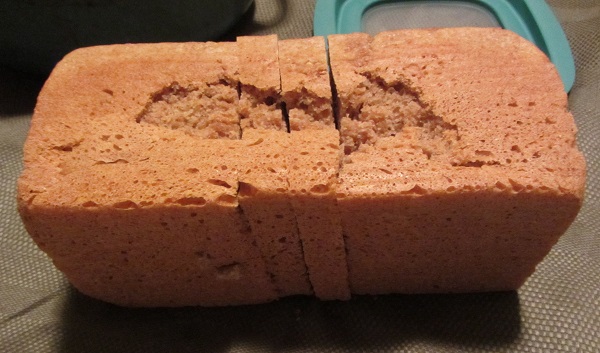
Spray a pullman pan lightly with Baker’s Joy. (I’ve tried more than a few ways of attempting to prevent the baked loaf from sticking to the pan. Baker’s Joy has been by far the easiest and most consistent solution. If overused Baker’s Joy with give the crust a vaguely weird and sticky quality, so don’t go overboard with it.)
Transfer the dough to a pullman pan and spread out the dough with wet fingers. Cover, and let rise until 1/2″ to 1″ from the top of the pan. Preheat oven to 350F when the dough is getting close to ready.
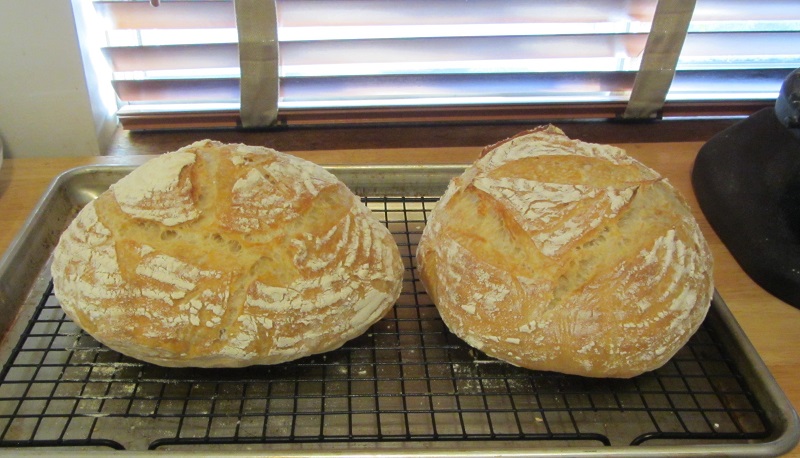
Bake, covered for 30 minutes then remove the cover and bake for another 25 minutes or until the loaf reaches 195-205F.
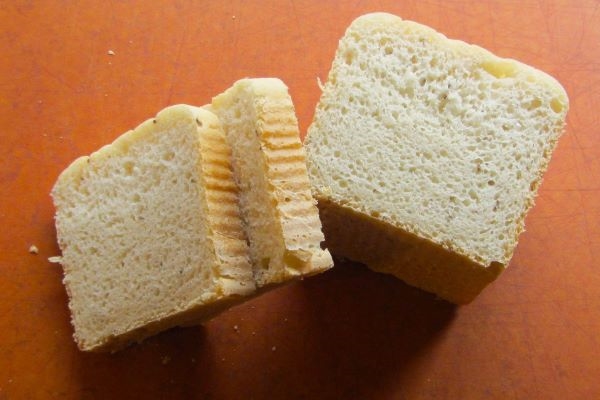
I had been using powdered milk in the recipe, but it didn’t seem to be adding flavor. I thought it might also be contributing to the finished loaf being a little crumbly, since when used in moderation the powdered milk is supposed to help with loft. Simpler might be better here.
This recipe still technically functions as a same-day loaf, given I always have a starter in the refrigerator. The weekly sandwich bake then doubles as an opportunity to remember to refresh the starter. Win-win.
Happy baking