Rick Bayless’ Tomato Carpaccio Salad And A Pulled Pork Cuban Sandwich “Stromboli”

Setting the site record for longest post title by far..

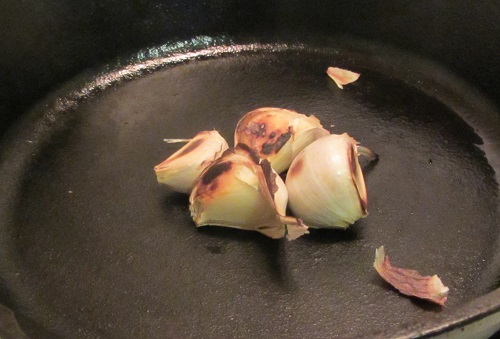
The tomato and tomatillo plants are heavy with fruit right now so it’s time for Rick Bayless’ Tomato Carpaccio Salad:

190908 tomato carpaccio salad

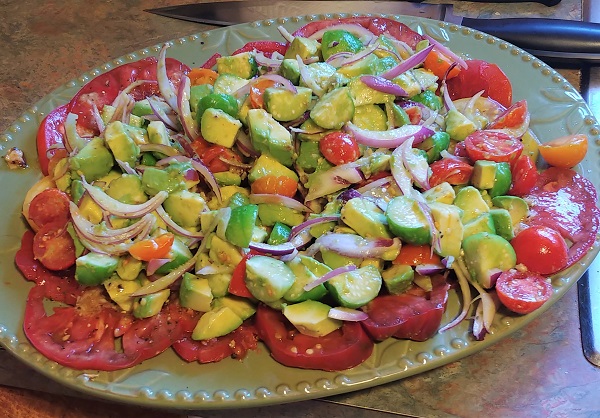
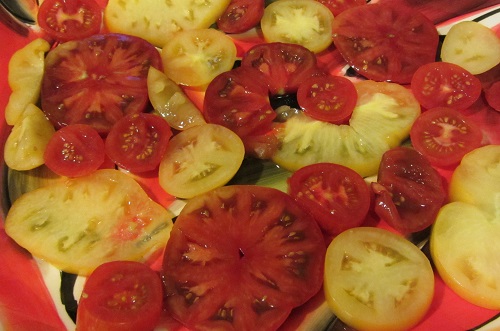
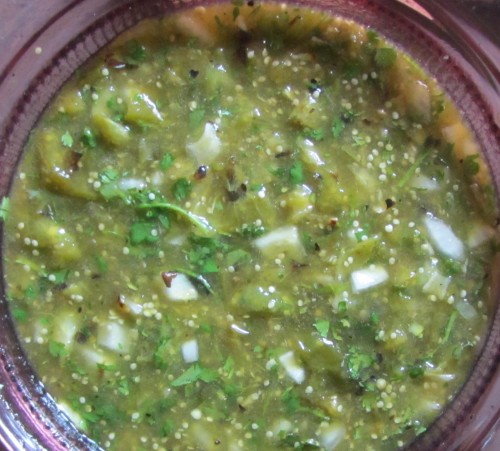
We last posted the salad recipe in 2014.  The 2019 version featured Black Krim and Taxi tomatoes as the base. The pictured tomatillo salad topping included Oregon Cherry and Sun Gold tomatoes as well as avacado and red onion.

The salad was fairly filling for three adults, but we had some frozen pulled pork to use up as well as some “empty” jars of mustard. I really dislike that bit of waste, so I rinsed out the mustard jars in a little bit of water and used that as a base to reheat the pulled pork. We then moved the thawed pork to a mixing bowl and added shredded cheese and mustard-pickle relish.

The pork mixture was originally intended to become Cuban Sandwich Style Pulled Pork Pigs In A Blanket, but there was too much filling for that so it became a Cuban Sandwich Style Pulled Pork Stromboli:

190908 cuban pulled pork stromboli

Served with more of the mustard-pickle relish on the side. Super tasty.

The dough was basically a simple pizza dough — 400g AP flour, 240g water (60%), 10g salt (2.5%), 1 tsp yeast. Roll out the dough into a rectangle about 10″ x 8″. Arrange the filling in a row down the center of the long axis and fold the dough over the filling, overlapping slightly. Press to seal the seam. Place the stromboli on a parchment or Silpat-lined sheet tray seam side down. Slice a few cuts into the top so that steam can escape — I placed cuts about every 2 inches which then became the portion sizes after it came out of the oven. Bake at 425F for 30 minutes.

If there’s extra dough it can become bread sticks.

Next time I’ll cut the salt back to 2%, I think the extra salt may have toughened the finished product a little bit. The extra bite would have been fine with pigs in a blanket but the stromboli form was already enough work to get through without the added salt.

Still, a very nice dinner all around. Thanks to SeattleAuthor for his help in the kitchen.

Rick Bayless’ Tomato “Carpaccio” Salad

by A.J. Coltrane

The Actual Title is much longer than that — Heirloom Tomato “Carpaccio” With Tomatillo Salad, Avacado and Fresh Herbs. LWN recipe link here.

The recipe:

INGREDIENTS

  • DRESSING
  • 3 garlic cloves, unpeeled
  • 1/4cup (lightly packed) cilantro leaves
  • 2 1/2tablespoons light vinegar (like cava or rice wine vinegar)
  • 1/4cup good-quality olive oil (or unrefined corn or peanut oil)
  • Freshly ground black pepper, usually about 1/4 teaspoon, plus addition for the sliced tomatoes
  • Salt
  • SALAD
  • About 1cup Thinly sliced red onion (preferably the long, skinny
  • About 6ouncestomatillos, (preferably the small purple tomatillos – about 6 of them), cut into eighths (about 1 cup)
  • About 6ounces cherry tomatoes (preferably a mixture of red and yellow – about a dozen), cut in halves or quarters
  • 4 to 6medium-size ripe heirloom tomatoes, cored and sliced 1/4-inch thick
  • medium-sized avocado, pitted, flesh scooped from the skin and diced into 1/2-inch pieces
  • generous tablespoon roughly chopped fresh herb (cilantro is an easy choice, but don’t overlook basil, lemon balm, or anise hyssop – even arugula – or mixture of your favorites)

INSTRUCTIONS

In a small, ungreased skillet over medium heat, roast the unpeeled garlic, turning regularly, until soft and blotchy black in spots, 10 to 15 minutes. Cool until handleable, then peel off the paper skin. In a blender or food processor, combine the garlic, cilantro, vinegar, oil and pepper. Process until smooth, then taste and season with salt, usually about 1/2 teaspoon.

In a medium bowl, combine the onion, tomatillos and cherry tomatoes with 3 tablespoons of dressing. Let stand while finishing the salad, stirring from time to time.

On a very large platter, lay out the sliced tomatoes in as close to a single layer as possible.

Just before serving, dot the tomatoes with the avocado and sprinkle with the herbs and fresh-ground pepper (I like the pepper pretty coarse for the tomatoes). Drizzle with the dressing, then pile the tomatillo salad in the center, and your impressive tomato salad is ready to serve.

Some pictures:

Roasting the garlic. This is my new go-to way to roast garlic cloves. Turning on the oven to roast garlic seems so wasteful:

140919 roasted garlic

The tomatillo salad, before dressing. We used Sun Gold tomatoes because that’s what we had. (And Apple Cider vinegar as a best substitute for the recommended Rice Wine vinegar.) On the attempt that we served to company we scaled back the quantity of tomatillos a bit. Also, we decided that smaller tomatillos = better:

140919 salad

The “Carpaccio” element. Black Krim, Taxi, and Tigerella:

140919 carpaccio

The finished salad:

140919 combined salad

It’s a really nice recipe. As I mentioned, we scaled back the tomatillos a little bit for company. There’s a nice balance of sweet, fat, acid and salt. Every bite allows the opportunity to mix and match textures and flavors. We especially liked combining Sun Golds with tomatillos. Two thumbs up.

And since we’re overdue for a girl cat pic:

140920 girl cat

WSU couldn’t quite pull it off against Oregon.

Award Winning Caprese Salad

By Iron Chef Leftovers

Mrs. Iron Chef needed a dish for a work pot luck recently and of course she turned to me to ask if I would make something. I debated making my Mac and Cheese, but we weren’t sure if there was any way to heat it up and it has been too bloody warm to make Mac anyway. I figured that since the event was outside and during the heatwave we have been going through that a nice Caprese Salad would be a good choice and I would do it with a twist. Tomatoes are just about in season, watermelon is in season and I have more basil right now than I know what to do with so it seemed like a good candidate with easily accessible ingredients. It would be quick to make and easy to transport also. So I went with it. At the event there was a contest for best dish and guess what took home the top prize?


The Software

1 ¼ lbs. ripe, in season, tomatoes, cut into ½ in pieces

8 oz. Fresh Mozzarella, preferably Ciliegine size, drained, patted dry and halved

8 oz. Watermelon, cut into ½ inch pieces

1 ½ tablespoons coarsely minced fresh basil

1 tablespoon balsamic vinegar (or red wine vinegar)

2 table spoons extra virgin olive oil

½ teaspoon salt


The Recipe

In a large bowl combine the tomatoes, mozzarella and watermelon and toss gently to combine. Add basil, oil vinegar and salt and toss gently to combine. Taste and adjust salt and add fresh ground pepper as desired. Let sit at least an hour to combine (don’t refrigerate it) and toss just before serving. That is it, there is nothing else to do but enjoy.


What fresh mozzarella looks like. The ones you want to buy are in the lower right of the board and yes, I do recommend the Belgioioso brand.

Notes

The key to this is to use in-season tomatoes. The riper they are, the sweeter they are so if you grow your own, this dish will be much sweeter than if you use store bought ones. I prefer roma or cherry tomatoes for this dish, but just about any tomato will work except for the ones that you will find in the supermarket labeled as “slicing tomatoes”. The mozzarella should be available in the deli section of most mega marts and the ciliegine size are about the size of the tip of your thumb. You can use just about any size mozzarella balls (don’t use the slicing mozzarella, it doesn’t have enough moisture), you just want to cut the pieces into roughly the same size as the tomatoes and watermelon. If you are using home grown tomatoes that are really sweet, I would recommend using red wine vinegar rather than balsamic – otherwise you risk a very sweet salad. A nice trick for mixing the oil and vinegar – put them into a small container with a lid and shake vigorously a couple of times until combined. I usually have a small container of the two handy so I just need to shake it up and pour over a salad. Adjust the recipe to taste – if you want more tomatoes, or basil or mozzarella, or watermelon, add it. You may need more oil and vinegar, if you do increase the other ingredients – just do it slowly. This salad is also great with some raw sweet onions sliced thinly added to the mix and served over grilled bread.

Pea “Pesto”

by A.J. Coltrane

Pea “pesto” on a baguette. It’s this bread with these peas and basil:

140611 pea pesto

Ingredients with approximate volumes:

Super Sugar Snap Peas and Basil at a 1/1 ratio.

Goat cheese (about 1/3 of the total peas and basil)

Dash of Salt, Glug of Olive Oil


Super Fresh Ingredients That I Don’t Screw Up = a well received little plate.

I’m not planning to raise goats or grow wheat, so this is as close to truly homemade as it’s ever going to get. It’s sorta satisfying to get even that close.

Creamy Nettle Soup

By Iron Chef Leftovers

Soups are a great meal since they don’t generally require a ton of ingredients, are easy to make in a large quantity, are easy to make from a technical standpoint and don’t require a ton of attention. One of the simplest and most delicious soups I have ever come across is the creamy nettle soup at the old Le Gourmand space in Ballard. This soup was so good that I think it might actually be the best thing that I ever had there. Unfortunately the restaurant is long gone, but the chef, the great Bruce Naftaly, still runs cooking classes and shows you dishes that he served in the restaurant. Since we are approaching the tail end of nettle season, I figured that this would be a good one to put out there, especially considering the somewhat unpredictable Northwest spring weather. Not sure where to get nettles? Try Foraged and Found – they are at the U-District Farmer’s Market on Saturdays and Ballard on Sundays. You probably only have 1 or 2 weeks left in nettle season though, so you many want to hurry.


The Software

1 tablespoon of unsalted butter

1 medium leek, dark green part removed, quartered and rinsed and cut into ½ inch pieces, about 8 oz.

½ yellow onion cut into 6 parts, about 8 oz.

2 shallots peeled and quartered, about 4 oz.

1 Yukon gold potato, quartered, about 6 oz.

2 cups chicken or vegetable stock

¼ cup cilantro, roughly chopped

6 oz. nettles, washed

Salt and pepper

Nutmeg


The Recipe

In a heavy bottomed stock pot, melt the butter until it stops foaming over medium heat. Add the shallots, leek and onions and stir. Cook for about 15 minutes or until they soften, stirring occasionally. If the veggies begin to brown, lower the heat slightly, you are looking to sweat them, not brown them. When the veggies are soft, add the potato and stock. Cover and cook over medium heat for about 20 minutes or until the potatoes are cooked (you can pierce them with the tip of a knife with no resistance).  Add nettles and cover, cooking for 6-7 minutes until the nettles are wilted (this will also take out the stinging quality of the nettles). Remove from heat and puree in 2 batches, adding ½ of the cilantro to each batch. When done pureeing the soup, if the soup is too thick, stir in water or stock in small quantities until the desired thickness is achieved. If it is too thin, add some additional cooked potato puree to thicken it. Season with salt and pepper to taste. Serve hot or warm with a few grinds of fresh nutmeg and some nice bread.


Notes

If you can’t find nettles, use spinach instead. It won’t be as good but you will be able to make the soup all year round. The recipe will feed 4-6 people and scales really easily and can be served as either a main course or an appetizer. It will keep in the fridge for 2-3 days but freezes well and reheats easily, so it makes for a nice meal in a hurry. This soup is ultra creamy and luxurious, and, best of all, involves no actual dairy and can be made completely vegan by using veggie stock and olive oil instead of chicken stock and butter.


No-Fuss Roasted Potatoes

By Iron Chef Leftovers

Potatoes are not one of my favorite things to cook or eat since they act as more of a flavor vehicle for what they are cooked in rather than having a great deal of inherent flavor on their own. Mrs. Iron Chef however loves them so I do occasionally make them, but I am constantly looking for new ways to cook them.  I came across an easy, no-fuss, one pot recipe on America’s Test Kitchen that I figured was worth a shot. Basically it calls for braising the potatoes first and then searing them, but it didn’t involve even taking them out of the pot, and only a couple of ingredients, so it really doesn’t get too much easier than this.

The Software

1 lb. Red Potatoes, roughly 1 to 1 ½ inches in diameter, washed and halved

1 cup water

3 cloves of garlic, peeled

2 teaspoons of salt

3 tablespoons of unsalted butter, in 6 pieces

1 tablespoon, fresh squeezed lemon juice


The Recipe

Arrange the potatoes in the bottom of a skillet (don’t worry about over-crowding, it won’t matter, I used a 10 inch, straight sided skillet) so that all of the cut surfaces are in contact with the surface of the pan. Add the water (it should come up about half way on the potatoes, add more water if necessary), butter, salt and garlic to the pan. Turn burner on high and heat the skillet until the water comes to a boil. Reduce heat to medium and cover for about 15 minutes. Check if the potatoes are cooked after 15 minutes (a knife inserted should pull out easily), if they are not, cover until they are. Once the potatoes are done, remove the lid and remove the garlic to a bowl. Increase heat to medium high and continue cooking until the bottoms of the potatoes are golden brown – all of the water will evaporate leaving just the butter (this should take 10-15 minutes depending on your stove). While this is happening, mince the garlic and combine with lemon juice. Once the potatoes are done, remove from heat and toss in garlic and lemon. Season with salt and pepper to taste and serve.


Notes

I would recommend using a non-stick skillet for this process to keep the potatoes from sticking to the bottom of the pan. The recipe scales easily, just put enough potatoes to fit in the pan and add enough water to come up half way on the potatoes. You probably won’t need to add more butter unless you use something larger than a 12 inch skillet. Fresh rosemary, sage, thyme or oregano would work well with this recipe. Just mince them and add them at the end with the garlic.

Spicy Shrimp and Grits

By Iron Chef Leftovers

I really do enjoy shrimp, but since I am picky about where it is sourced and how it is processed, it tends to be spendy so I don’t eat it that often. For a recent party, I was tasked with making the small bites, so I decided to go with my take on a classic, shrimp and grits. I wanted something that was really easy to make and would still be fun an interesting, so I came up with this. It works nicely on a rice cracker and can be served as a sit down app or main course.


The Software

1 lb. 21-25 count shrimp, preferably sustainably wild caught, peeled and patted dry.

½ head cauliflower (about 1 lb.) trimmed into 1 inch pieces

2 tablespoons of olive oil

1 tablespoon butter

2 oz. grated cheddar cheese

1 oz. grated parmiggano reggiano

2 teaspoons cornstarch

Garlic powder

Kosher Salt

Chili flakes

1 smoked jalapeño (can be replaced with adobe)

Smoked paprika

Cumin

Oregano


The Recipe

The Spice Rub – make a spice mix. In a coffee grinder add 1 part each chili flakes, smoked paprika, cumin and  oregano, the smoked jalapeño (or one part adobe) and 2 parts each garlic powder and kosher salt. Pulse until a fine powder. (You can skip the grinding part if you are not using a whole smoked pepper as everything will already be powdered).

The Grits – steam the cauliflower in a covered pot for 10-15 minutes until tender. Transfer to a blender and add ¼ cup of the steaming liquid and 1 teaspoon of kosher salt. Blend until smooth. If the puree is too thick, add a little bit more water to thin. Transfer the puree back to an empty pot and add butter and cheese, stirring until combined. Check seasonings and add salt and pepper as necessary.

The Shrimp – heat a medium sauté pan over medium-high heat. Add 1 tablespoon of olive oil until just smoking. You are going to work in 2 batches with the shrimp. In a bowl, toss half the shrimp with 1 teaspoon of corn starch and 1 tablespoon of the spice rub until coated. Before putting the shrimp in the pan, shake off any excess. Cook the shrimp in the pan 2 minutes each side (don’t move them around) until done. Move to a plate, wipe out the pan and repeat with the second batch of shrimp

Serve the shrimp over the cauliflower grits.


Notes

I didn’t give exact measurements for the spice rub since it is scalable – you can use either a teaspoon or a tablespoon as your base measure, so the 1 part would be 1 teaspoon or tablespoon and the 2 parts would be 2 of either. You can easily adjust or change the ratios to go with your likes. You can use any size shrimp you want (I don’t think that I would recommend anything smaller than 26-30 count), but you will need to adjust the cooking time according to the size. You will still need to work in batches regardless of the size of the shrimp – you don’t want to crowd the pan when you cook the shrimp. I would also recommend that you don’t by any shrimp treated with Trisodium Phosphate (if you buy them in a bag, it should say. If you buy them from a fish counter, ask and don’t buy them if they are not sure – they should know), it affects the texture and you will end up with mushy shrimp.

Rick Bayless’ Roasted Tomatillo Salsa

by A.J. Coltrane

The tomatillos have been cranking out fruit. Four and a half pounds of the stuff were dominating the kitchen counters. It was time to make a salsa. It was time for a Rick Bayless recipe.

In short- it’s roasted tomatillos, jalapeno, and garlic, blended with water and cilantro. Minced white onion and salt are added at the end.

There were enough tomatillos for 9 batches of the Bayless recipe. (At 8 ounces of tomatillos, a Jalapeno, and two cloves of garlic per recipe batch.) To keep it manageable it got broiled it in 3 x 24 ounce groups:

090113 salsa batches

I just noticed — everything got scaled properly except the garlic. Each of those batches should have six cloves of garlic, not two. Oh well.

Removed to bowl to cool:

Keep the juice created by the broiling process.

Then the blending. Then the onion and salt. If I had it to do over again I would have used less than the recommended amount of water and added it later if I felt the salsa was too thick. As it was, I felt like the salsa was a vaguely loose.

090113 salsa complete

Overall though, it went over well. This is the new go-to green salsa recipe.

Rick Bayless' Roasted Tomatillo Salsa

by A.J. Coltrane

The tomatillos have been cranking out fruit. Four and a half pounds of the stuff were dominating the kitchen counters. It was time to make a salsa. It was time for a Rick Bayless recipe.

In short- it’s roasted tomatillos, jalapeno, and garlic, blended with water and cilantro. Minced white onion and salt are added at the end.

There were enough tomatillos for 9 batches of the Bayless recipe. (At 8 ounces of tomatillos, a Jalapeno, and two cloves of garlic per recipe batch.) To keep it manageable it got broiled it in 3 x 24 ounce groups:

090113 salsa batches

I just noticed — everything got scaled properly except the garlic. Each of those batches should have six cloves of garlic, not two. Oh well.

Removed to bowl to cool:

Keep the juice created by the broiling process.

Then the blending. Then the onion and salt. If I had it to do over again I would have used less than the recommended amount of water and added it later if I felt the salsa was too thick. As it was, I felt like the salsa was a vaguely loose.

090113 salsa complete

Overall though, it went over well. This is the new go-to green salsa recipe.

Grilled Cheese and Tomato Soup – Iron Chef Leftovers Style

By Iron Chef Leftovers

A happy grilled cheese with some gazpacho on the side. The green in the middle of the gazpacho is some minced green zebra tomatoes.

With an overabundance of tomatoes right now, I have to get creative in what I do with them; frankly, I am a little tired of eating tomatoes right now, no matter how good they are. Being in summer, I don’t know that I really want a hot meal all of the time and during one recent stretch of hot weather, I decided it was gazpacho time, and what pairs better than a grilled cheese sandwich with tomato soup. I figured that since I had some great tomatoes, I would take the sandwich up a few notches too. You can get the gazpacho recipe that I used here.


The Software

4 slices of brioche sandwich loaf, ¼ to ½ inch thick.

3 oz. of cheese of your choice

2 slices of prosciutto


The Recipe

In a 275 degree oven, put the brioche on a baking sheet and bake until just slightly dry (the consistency of barely toasted bread), about 15 minutes.  Remove from the oven. Prepare the bread by putting ¼ of the cheese on each slice of bread. In a griddle pan large enough to hold the 4 slices of bread, cook the prosciutto until crispy on both sides over medium heat, about 2-3 minutes a side. Raise the heat to medium high and add the butter to the pan. When the butter stops foaming and beings to brown slightly, add the bread with the cheese side facing you and reduce heat to medium. When the cheese begins to melt, add the prosciutto and make a 2 sandwiches, pressing the bread together. Reduce heat to medium low and put a heavy, flat pot lid on the sandwiches. Cook for about 2 minutes on each side, checking to make sure the bread is not burning, or until the cheese is completely melted. Remove from heat, cut and server immediately with the gazpacho.


Notes

I really like doing this with brioche as it adds a really deep flavor to the grilled cheese. I would recommend buying cheese in a block and shredding it yourself, shredding the cheese, rather than using slices, causes the cheese to melt faster. I used a combination of Manchego, Aged Cheddar, Emmenteller and Beecher’s Flagship, but you can use whatever cheese you would like.