Bread Basics – Class Outline page is now active. The page started in 2016 and is still a work in progress.
A baking and gardening journal. Mostly.
Bread Basics – Class Outline page is now active. The page started in 2016 and is still a work in progress.
For Thanksgiving I thought I’d give Peter Reinhart’s recipe another try. (2015 post here. 2016 post here. Ruhlman original post here. The skeleton of the post below is copied and pasted from the 2015 post.)
From the Bread Baker’s Apprentice — Peter Reinhart’s Double Celebration Challah. The “Double Celebration” indicates a double-decker of braided dough — a smaller braid sits on a larger braid. I increased the recipe by 1.5x because we were feeding a crowd:
| Ingredient | Measure | Baker’s % |
| Bread Flour | 27 oz | 100 |
| Sugar | 3 TBP | 5.5 |
| Salt | 1.5 tsp | 1.4 |
| Instant Yeast | 2 tsp | 0.85 |
| Softened Unsalted Butter | 3 TBP | 5.5 |
| Eggs, beaten | 3 large | 18 |
| Egg Yolks | 3 | 7 |
| Egg Whites, whisked until frothy | 3 | 7 |
| Water | 12 oz | 45 |
and Sesame Seeds for garnish.
1. One day ahead of time, combine 10.5 oz of water and bread flour in the bowl of a stand mixer. Cover with plastic wrap and leave it at room temperature. (It’s a simple Poolish without yeast. This would also be fine up to three days in the refrigerator, if so, remove from the refrigerator at least 2 hours before continuing.)
2. Stir together 15 oz flour, sugar, salt, and yeast. In a separate (mixing) bowl combine butter, eggs, and yolks. Turn the mixer on low speed. Add the wet ingredients to the mixer, then slowly add the dry mixture until the ingredients gather and form a ball.
2. Mix on medium low speed for 6 minutes, adding more flour if needed to make a dough that is not sticky.
3. Lightly oil a large bowl. Form the dough into a ball, coat with oil, and let rest one hour, covered.
4. Remove the dough from the bowl and knead 2 minutes to degas. Return the dough to the bowl and let rest 1 hour.
5. 2/3rds of the dough becomes the big braid, and 1/3rd becomes the small braid. Each of those portions are divided into 3rds again, and rolled out into ropes which are smaller at the ends and larger in the center. The ropes are then braided, tucking the ends underneath. Watch this for help on how to braid. Transfer the big braided portion to a parchment lined baking sheet, top with the smaller braided portion.
6. Brush the loaf with an egg whites wash, spray with oil, loosely cover with plastic wrap, and let rest 60-75 minutes until the the dough has grown to 1.5x its original size.

7. Preheat the oven to 325F. Brush the loaf again with egg wash and sprinkle with sesame seeds. Bake on the center rack for 20 minutes, then turn and bake another 20-45 minutes. The bread is done when golden brown and an instant thermometer reads 190F. (The pictured loaf saw 25 minutes after turning, which I think was too long. More on that below.)
8. Transfer to a cooling rack and wait at least an hour to eat.

Notes:
I think every time I’ve made this I’ve come away thinking it could be better. 20 minutes + 25 minutes brings the internal temperature closer to 205F than 190F. In the future I’ll likely check the temperature at about the 20 + 15 minute mark. I also think the challah would benefit from a little more salt than the recipe calls out, perhaps even just an extra 1/2 tsp to take the total to 2 tsp (not including the salt in the eggs.)
We had a little bit of extra dough at the end of one of the braids. We were going to visit a 6-year old on Thanksgiving, so:
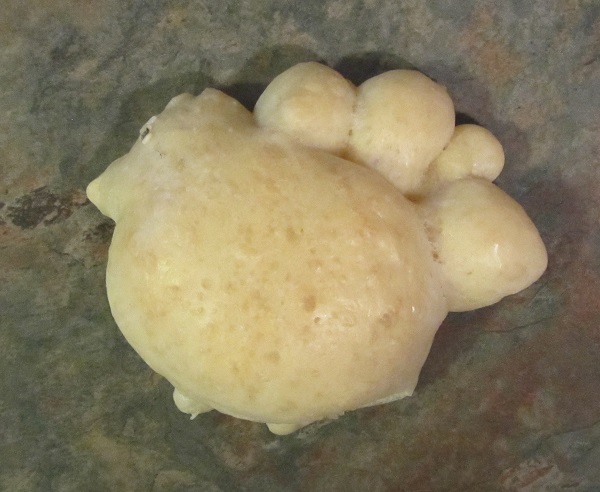
In reality the “body” is about 4 inches across. It has an “eye” of sesame seeds and a piece of black sea salt. The “turkey” went into the oven with the challah and was pulled at the 25 minute mark.
The kid seemed to dig it.
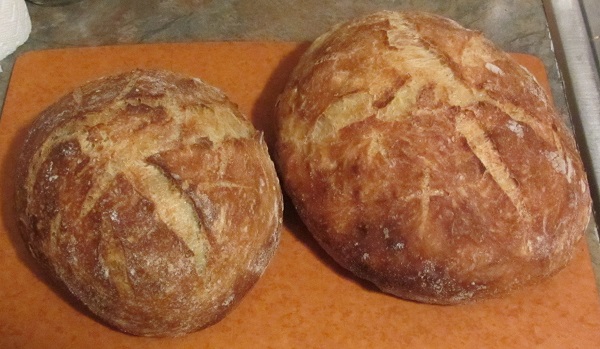
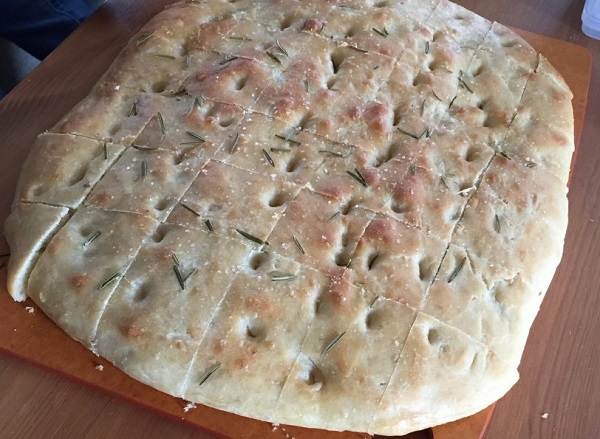
A Ciabatta. I substituted out 20% of the bread flour and replaced it with Spelt. For reference, the finished bread is about 12″ across:

I started baking with Spelt in 2018. Those blog posts are now gone as part of the move to the new site. For background, Spelt breads will hold air bubbles but the structure Spelt provides is very fragile and it requires gentle working and handling to avoid degassing.
The Recipe and Process:
400 grams KA bread flour, 100 grams Spelt flour (Bob’s Red Mill), 360 grams water (72% hydration), 15 grams olive oil (3%), 10 grams kosher salt (2%), 1/2 teaspoon instant yeast. That’s less than half the yeast that I’d use if I planned to bake the bread a couple of hours after mixing, but I had other ideas.
The dough was mixed for eight minutes, covered, and allowed to proof for around 4 hours. I then did a two “stretch and folds”, shaped the dough into a ball, and allowed the dough to proof on a parchment covered pizza peel for another two hours. (I covered the dough with an inverted large bowl during the 2nd rise.)
For baking: The oven and baking stone were preheated to 425F for 30 minutes. I added 1 cup of water to a sheet tray and placed it on the bottom shelf. When the water in the sheet tray was steaming I slid the parchment and dough from the peel onto the baking stone. Total bake time was 35 minutes. (At 30 minutes the internal temperature was only 192F, so I gave it another 5 minutes.)
Postmortem Thoughts:
From Bakerpedia:
Baked goods made with spelt flour will be more dense and heavy than those from wheat flour.
Spelt flour has a much higher water absorption capacity, giving a somewhat smaller loaf volume than common wheat flour.
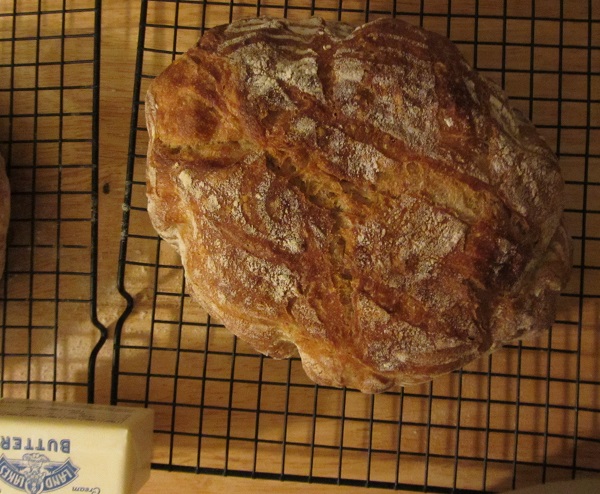
Which is basically describes the finished loaf. While proofing the dough spread more “out” than “up”, and there wasn’t much oven spring, even though I’d slashed the loaf prior to baking and provided steam in the oven. The crumb wasn’t “tight” but it wasn’t “holey and rustic” either.
Spelt provides a nice nutty taste, and some je ne sais quoi, which is part of the reason I chose to include it in a same-day preparation. I also like Spelt because it tastes less refined and sugary than regular bread flour.
Overall it was a pleasant loaf. I sliced it thinly so that each piece wasn’t heavy and we served it with good butter. It didn’t last even half-way through dinner.
We lost every blog post after mid-September 2017 in the move to the new host and address. Public Service Message: Back Up Your Files Frequently!
Some bread pictures from 2017-2018:
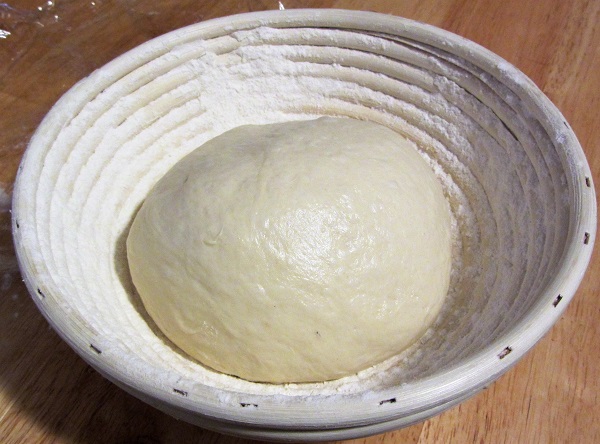
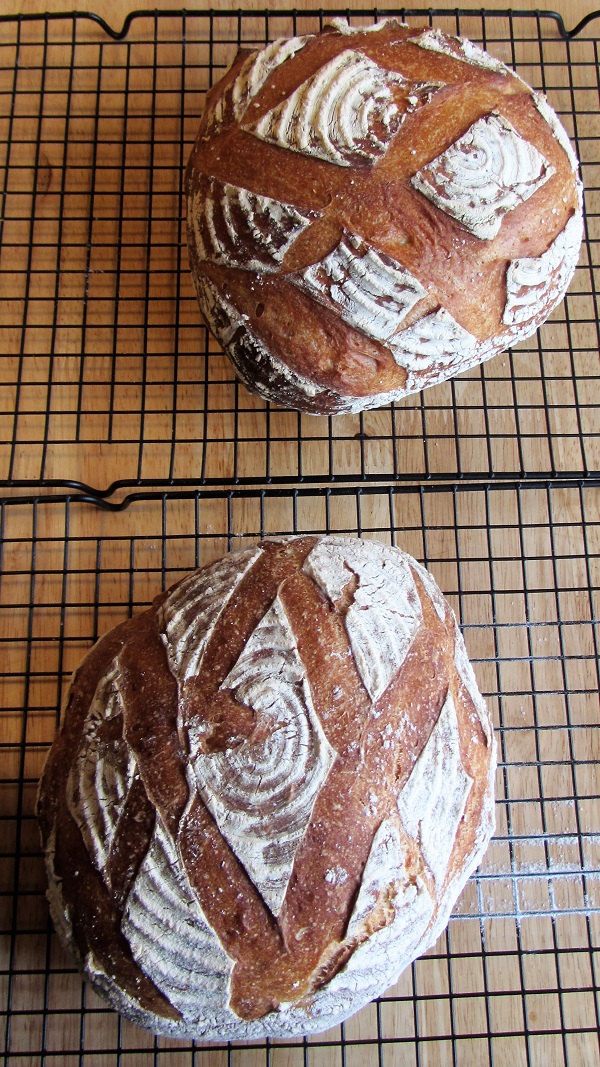
A medium-or-high hydration rustic loaf. The pattern in the flour is created by proofing the bread in a banneton:

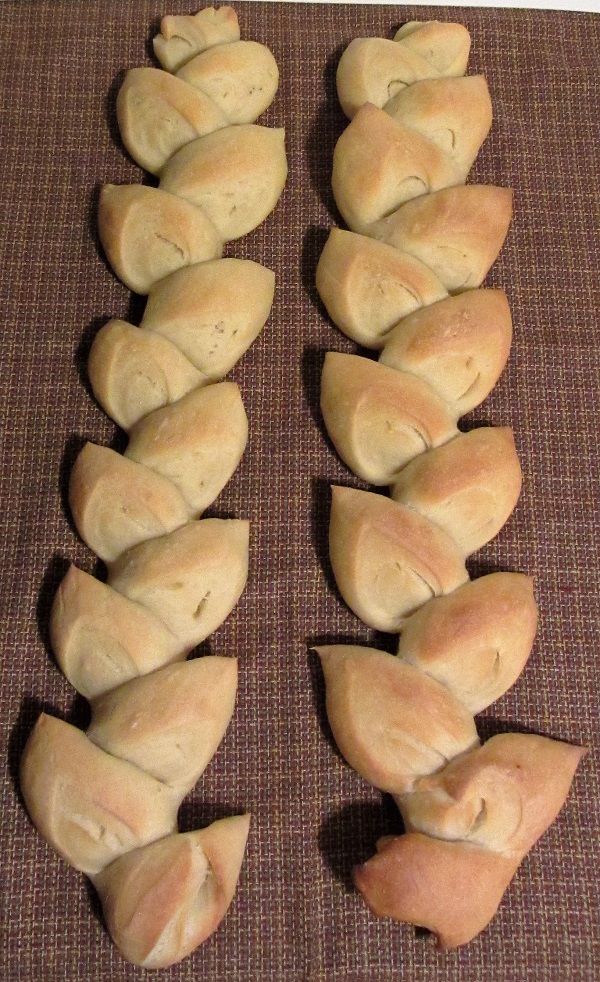
The file title of the photo below indicates that at least one of these two loaves used barley flour. I believe the smaller one used ~30% barley flour:
The photo below is why I don’t try to use parchment when baking No-Knead breads. The parchment didn’t allow the bread to spread out in an organic fashion. It tasted fine. But. Ugly.
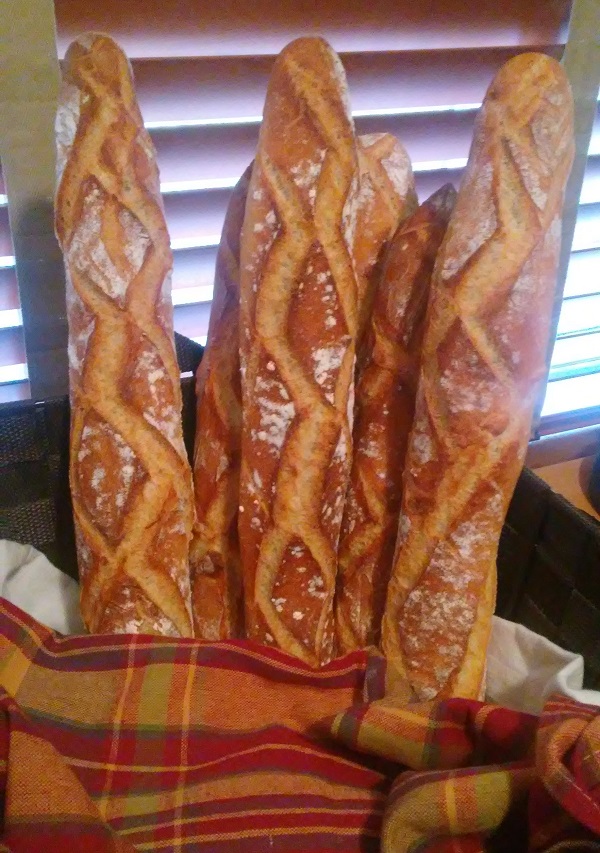
I was pretty proud of the way these came out. They’re simple baguettes, around 60-65% hydration.
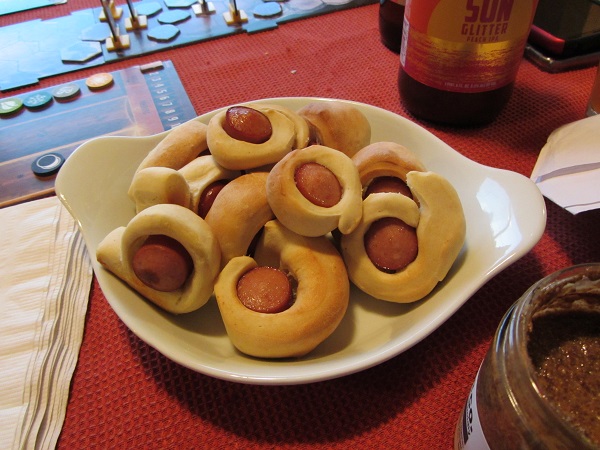
The pigs in a blanket experiment. It’s basically a simple pizza dough wrapped around hot dogs, sliced, then baked ~425F for 15-18 minutes.
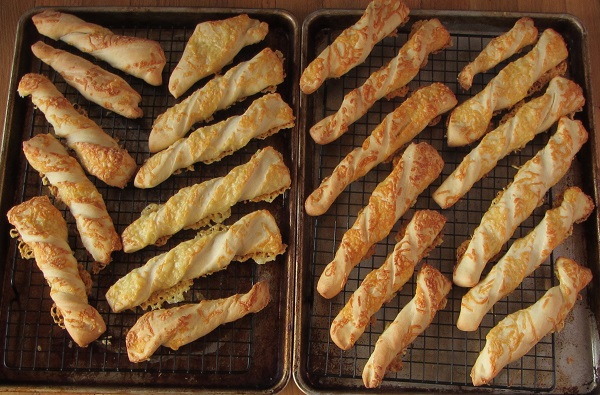
Cheesy breadsticks. Parmesan in this case. Always a hit at beer events.
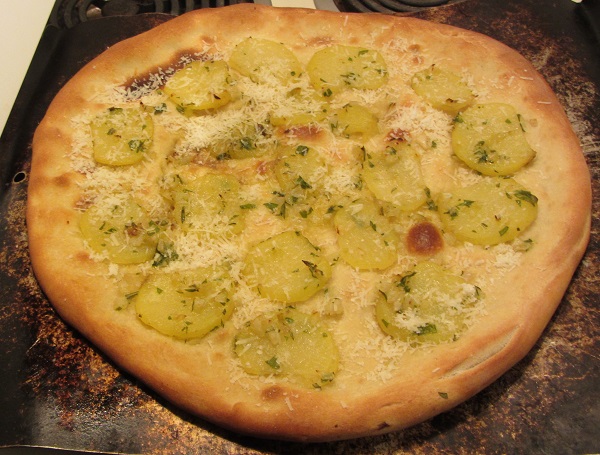
Lastly, a potato pizza:
-A.J.
I’m getting more comfortable with the bannetons. I think they’re getting more “seasoned” too.
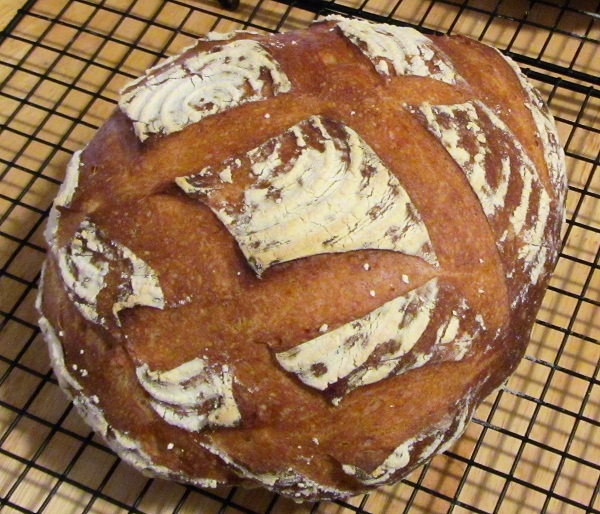
A boule “born” on the 4th of July:
The Recipe – 600 grams bread flour, 390 grams refrigerator water (baker’s percentage 65%), 13 grams salt (2.25%), 6 grams diastatic malt powder, 3/8 tsp instant yeast.
This bread was a little bit of departure for me in a few ways:
The slashing was less than perfect: I need to swap out the razor blades for something newer and sharper a little more often.
-A.J.
Authors write about “Twelve Steps” (or more) to baking bread, which sounds like a lot of processes:
I “simplify” it in my head into four groups of “Activities”:
At the end of each Activity there’s a natural rest break.
In effect then, Twelve Steps become Four Activities:
That sounds pretty manageable, doesn’t it? If you don’t count the baking step it’s only three Activities. Easy.
I bring all this up because I’d gotten into the habit of skipping Activity #2 when making focaccia. I’d mix, then coax the loose dough into a parchment-lined tray, allowing for one rise in the tray.
And that was fine, sort of. The focaccia were well-received, though I thought they had the potential to be better. As it turns out, if you don’t skip an Activity that people having been doing for thousands of years the results improve! Behold the power of trial and error!
A two-pound focaccia from Easter dinner:
A one-pound focaccia we ate with dinner last night:
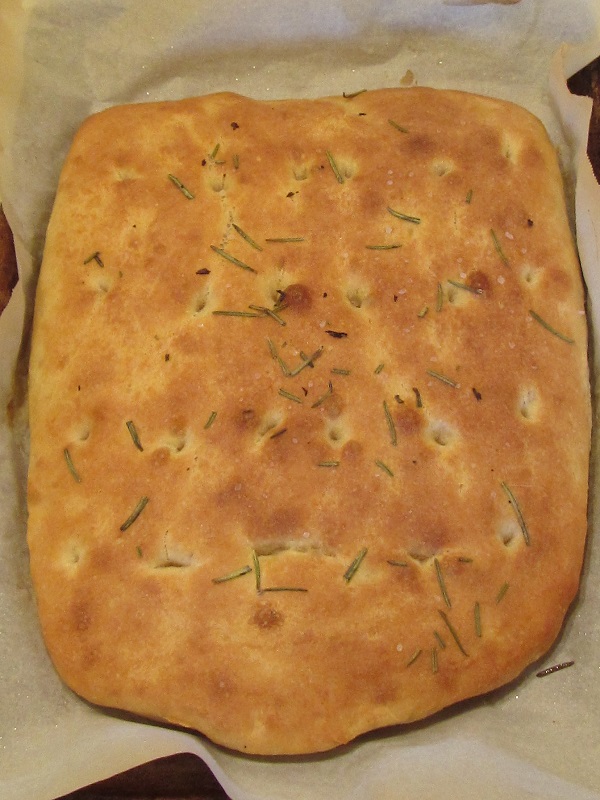
Re-introducing the initial bulk fermentation gives a better crumb structure — the bread becomes more airy, with uniform bubbles throughout. I think that’s partly because the extra rest and handling means that the bubbles get redistributed more evenly. I’ve cut back on the oil too. The end result is a lighter, less oily focaccia.
Both breads: 70% hydration, 6% oil, 2% salt (not counting the pink salt), about 1% diastatic malt, baked at 425F for 24 minutes.
————————
Here’s a Cheap Seat Eats post from January of 2016 talking about a good result due to allowing for an initial 30-minute rise before transferring the dough to the tray. Which means I’ve re-re-learned something. That’s good, right? The biggest difference between that one and these two is that the oil percent for these two were 6% rather than the 3% in the 2016 post. That, and I allowed for a 30-minute pre-ferment in 2016. These two got ~1 hour.
A 100% hydration, 6% oil focaccia, August 2014.
Another 100% hydration, 4% oil focaccia, August 2014. 20-minute rest. Note the somewhat irregular hole structure.
80% hydration, 7% oil, September 2014. 1-hour rest.
70% hydration, 3% oil, December 2015. 1-hour rest. The crumb structure looks fairly tight, though that might just be the photo. It was served with stew, so I might have been targeting that result.
75% hydration, 8% oil, January 2014, topped with onions. No rest. The color isn’t very deep in the photo.
113% hydration, 9% oil, May 2013. 4-hour rest. Beranbaum’s recipe.
——————–
For a good, brief description of the Steps see this Reddit post.
-A.J.
Buttery Cheesy Breadsticks:

These don’t skimp on the butter or the cheese — the butter weight is 25% of the flour weight.
The recipe: 600 g AP Flour, 150 g room temperature butter, 300 g refrigerator water, 12 g kosher salt, 1 tsp instant yeast. (1+ cup of Grated Pamesan is applied to the dough sheet in step 5, below.)
The finished weight of the breadsticks is somewhere North of two pounds — seven people wiped these out in no time. The nice thing about this recipe is that it will hold in the refrigerator for a few days, then be ready to eat in about an hour.
I’ll be making these again. They were a big hit.
-A.J.
Epi Bread makes an appearance at the Iron Chef Leftover Annual Lasagna Party (cell phone pic):

I feel like everything came together pretty well this time around. The color was better than usual due to the addition of egg wash — two eggs were beaten then strained and brushed onto the doughs before the doughs were cut into the Epi shape. The egg wash created more contrast between the light and dark parts.
Each individual Epi was around 15″ long. The finished weight of all of the breads put together was around five pounds.
As far as the actual “mechanics”:
Each “batch” was three breads at 150 grams of flour each.
This time around I used a refrigerated “Poolish” (preferment) that I started on the 22nd — two days before the event. I went with a refrigerated Poolish because on the 22nd we weren’t sure we were going to be able to make it to the event, and I could bake the dough on the 25th if we missed out on lasagna.
To make one batch of Poolish combine 150 grams of bread flour, 150 grams of refrigerated water, and a pinch of instant yeast. Mix on low speed for 8 minutes. Cover. It can be refrigerated for up to three days with no real loss in quality.
(I did all three batches together (900 grams total), then divided it out into three – 300 gram units on baking day.)
On baking day combine in the mixer one batch of Poolish with 300 grams of bread flour, 120 grams water, 9 grams of salt, 1/3 stick unsalted butter (36 grams), and 1 teaspoon of instant yeast. Mix for eight minutes. Hand knead a little if the dough looks rough. Let rest, covered for 20 minutes.
Divide into three pieces and roll each piece into a baguette shape that will fit lengthwise into a Silpat-lined sheet tray. Cover and let rise two hours.
Brush each baguette with (beaten and strained) egg wash. Using scissors, cut the breads and lay the cut segments off to the sides for the finished Epi shape.
Bake at 460F for 22 minutes. Carefully remove to a cooling rack. (I used tongs to slide the Silpat out of the sheet tray, then slipped the Epis off of the Silpat.)
The addition of butter to the recipe made the finished product a little richer and dinner-roll like. The Epi shape made it easy to cut or break off pieces, and increased the total amount of “browned goodness” surface area. I’d like to think those decisions helped the breads fit in with the rest of the meal. Nobody complained.
[Total recipe in Baker’s Percentage is 60% hydration, 8% butter, 2% salt, yeast. Or: 450g bread flour, 270g water, 36g butter, 9g salt, yeast.]
-A.J.
I’ve been meaning to try out the combination of banneton + baking stone when making a “hearth” bread. Hamelman recommends a 73% hydration dough for his Ciabatta, but I knew if I went that high the odds of “disaster” would be pretty high too. I settled on a more moderate 65% hydration for this first pass, something along the lines of a French Bread, though it’s really a “65% hydration boule” (ball).
The recipe involves light mixing followed by three folds at one hour intervals, then a two hour rise in a banneton.
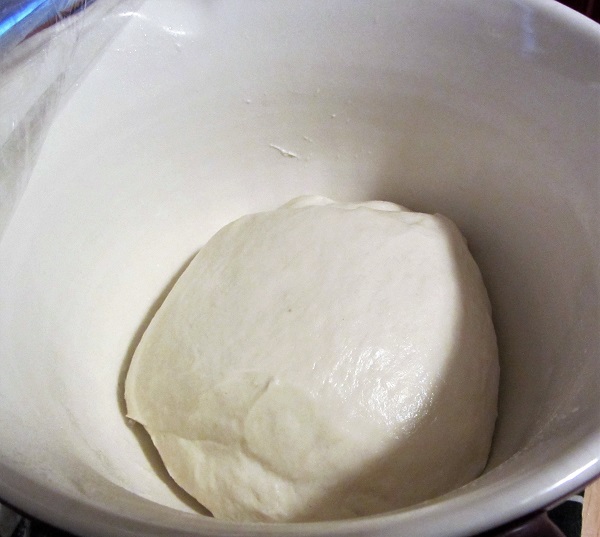
The first picture was taken right after the light mixing:

Notice how the dough is somewhat shaggy. It’s fairly sticky too. Over the next few hours it’s going to shape up.
Here it is after fold number one:
The “folding process” involves taking one edge of the dough, stretching it out, then folding it back on the mass. Then the stretch is done to the opposite side — repeat until all four sides have been stretched and folded back onto the mass. If you look closely you can see the last fold sitting on top with a slight seam running left to right.
Here it is after fold number two:

Not much evidence of the seams this time. The dough has gained a lot of structure, and it’s not nearly as sticky as it was — now it’s just sort of tacky.
An hour later was the third fold, and the dough placed placed into a well-floured banneton:
I should mention because it isn’t pictured: During every rise the bowl/banneton was covered with plastic wrap.
The dough was allowed to rise for two hours. An hour prior to baking the stone was placed in the oven and the oven was preheated to 460F.
The dough ready to be flipped onto the pizza peel:

And out of the oven (I baked one at a time):
The appearance is due to the floured rings of the banneton, combined with slashing the dough prior to baking. It looks involved, but it’s really pretty simple.
Overall the structure was a little tighter than I would have preferred — the “right” answer to that is probably more steam and higher hydration. The first dough stuck to the pizza peel, which was the “disaster” I was trying to avoid, and it’s why I used a moderate hydration in the first place. (And it degassed the dough somewhat, which is not what I wanted.) I used ample flour for the second dough and that one released fine.
There’s definitely a “wow” factor with this approach. I’m sure I’ll do it at least once again during the holidays.
—–
The recipe is based around Hamelman’s “Ciabatta with Poolish” (Bread: A Baker’s Book of Techniques and Recipes)
The day before — make the Poolish (120g bread flour, 120g water, a few grains of yeast. I added 2% salt to the Poolish, which is not classically correct — I wanted the Poolish to not go totally crazy and overproof.)
Baking day:
Again, it looks like a lot of steps, but it’s really pretty easy. Just set the timer and forget it for a while.
by A.J. Coltrane
Attempt #2 at Epi bread:
It’s basically just a baguette recipe: 400g Bread Flour, 240g water (60%), 9g kosher salt (2.25%) 3/4 tsp instant yeast. 425F oven for 22 minutes.
The shape is better this time around. Each Epi contains less flour — 200 grams (1/2 lb) of flour per epi. (Instead of 300 grams of flour as in Take One.)
I think maybe the “right” answer is 150 grams of flour per 18″ Epi. Baking at 450F and adding malt might help the appearance as well.
Still. Better this time. “Better” is good.
