Beer of the Week: NW Peaks Cascadia Shale Ale

By Iron Chef Leftovers

untitle8dIn 2012, NW Peaks made a dark version of their Eldorado Pale Ale which was outstanding.  In 2013, they made a hoppy dark beer called Cascadia Shale Ale. The beer was a bit big at 6.5% ABV and was available on tap at the tasting room.

The beer pours very dark brown in color with a light tan head, showing lots on malt on the nose with hints of chocolate and hops supporting the malt. On the palate, the beer is hop forward; mild bitterness with hints of pleasant and not overpowering citrus followed by malt with hints of chocolate before finally yielding back to hops with more light bitterness and a hint of alcohol and resin on the very end of the beer. I would have liked a slightly smoother finish (the beer did come off as slightly hot) but it was still outstanding and complex with multiple layers of flavor. This was a somewhat malty version of a CDA, perfect for an overcast Northwest evening in the fall.

NW Peaks Cascadia Shale Ale rumbles in with 4 subduction quakes out of 5.

Beer of the Week: Epic Ales Desert Rye Farmhouse Ale

By Iron Chef Leftovers

untsaditledThere are two breweries that drive me nuts because their names are almost identical. There is Epic Brewing out of Utah which makes some fantastic Belgian style beers and there is Epic Ales out of Seattle who tend to do some off the wall farmhouse style beers. I have seen more than one occasion where a tap last has listed the wrong brewery. In the case of the Desert Rye Farmhouse Ale, I originally just wrote Epic on my noted. In going back over them, I realized that I had no idea which Epic it was. After doing a bit of digging, I realized that it was the Seattle Epic that put out this beer. Given that it was a farmhouse beer with rye, I needed to give it a shot.

The beer pours cloudy with the color of peach/apricot jam and has an interesting nose – notes of grain and yeast dominate, supported by light notes of rye and hints of sugar. The beer is really complex on the palate, starting off with heavy rye notes before moving into a grassy farmhouse funk with lots of Belgian yeast and grain helped by very light citrus, finishing with light hops and more funk. The rye lingers thought the entire progression and is a bit harsh at the beginning, but it smooths out by the end of the sip and enhances the other flavors. The farmhouse component becomes more pronounced as the beer warms making for a very different beer by the end of the pint.

This is a beer that is really not for everyone, but is well balanced and complex to the point of being very different than most everything else out there.

Epic Ales Desert Rye Farmhouse Ale comes in out of the field with a heavy load of 4 hay bales out of 5.

The Road to the Super Bowl Runs Through…

By Blaidd Drwg

You hear all about home field advantage in the NFL, and there is definitely an advantage to playing at home, in the regular season. Come playoff time, momentum seems to be more important than playing in your front. I think it becomes exaggerated because the #1 and #2 seeds end up sitting around, doing nothing for a week and lose some of their competitive edge. I decided to take a look at just what kind of impact the bye week had on the top 2 seeds since the NFL went to the 8 team playoff in 2002.

#1 Seed

Game Wins Losses
Divisional Playoff 13 9
Conference Championship 9 4
Super Bowl 2 7


#2 Seed

Game Wins Losses
Divisional Playoff 15 7
Conference Championship 5 10
Super Bowl 3 2


The results are definitely surprising. The #1 seed has won just 59% of the time in the Divisional Playoff game. Considering that is a team that generally has won better than 75% of its games at home during the season, I would have expected better. The #2 seed wins about 68% of it Divisional Playoff games, which seems about right considering that they get the highest remaining seed for that game (usually the 3 or 4 seed). I suspect that the #1 seed ends up getting the tougher team for their matchup since it seems, especially over the last few seasons, that there is at least one Wild Card team who ends up with a better record than a couple of the division winners.

When you get to the Conference Championship game, it gets a bit interesting. There have been 8 times in the 22 instances that #1 and #2 have squared off in that game, with the #1 seed holding a 5-3 advantage in those games. That makes the results look a bit weird against the other seeds:

  #1 Seed #2 Seed
Vs. 1 or 2 seed 5-3 3-5 (On The Road)
Vs. any other seed 4-1 2-5 (At Home)


Basically, if you are the #1 seed and you survive the Divisional Playoff game, you really would rather face anyone other than the #2 seed.

Either way, I would almost be willing to bet that you won’t be seeing a Seattle – Denver (this year’s #1 seeds from their respective conferences) Super Bowl matchup. A battle of #1’s has only happened once in the last 10 seasons – in 2009 when Indy and New Orleans squared off.

Beer of the Week: Populuxe Gingersnap Amber

By Iron Chef Leftovers

imagesCAAR87MMI know I have said this before, but I don’t really like ginger in my beer. Don’t get me wrong, I love ginger, I use it frequently in my cooking, but I feel like it tends to overpower the subtle flavors of beer to the point where it is all you end up tasting. Populuxe put on tap their Gingersnap Amber recently, and I decided that I needed to try it with some reluctance. The beer clocks in at just 5.5% ABV.

The beer pours amber in color with notes of toffee, malt and gingerbread on the nose. Gingersnap drinks heavier than it smells, starting off with a mild yeastiness before moving into light toffee and caramel notes which pleasantly linger for a long time before moving into a delicious cookie like flavor with hints of sugar and very light ginger coupled with light molasses and toffee. The finish is extremely long and pleasant, reminding me of a really nice gingerbread cookie without the crumbs. Well balanced and easy drinking, this beer manages to draw some big flavors into the picture without having to empty the spice rack or overpowering the palate.

Populuxe Gingersnap Amber preps for the holidays with 4 warm cookies out of 5.

An Inexpensive EarthBox Hoop House

by A.J. Coltrane

SeattleAuthor brought over Mâche seeds the other day, so it seemed like a good time to make a hoop house to keep the rain off of the seedlings. The hoop house was intended for the front yard, so it had to look decent. I was also targeting the minimum cost that would still allow for a “sound” end result. The finished cost was about $4.

140714 hoop house

Bill of Materials

~8 feet of 1/2″ pvc (black, flexible). Cut into two 4′ pieces. (Of a 100′ roll @ $16. An 8′ length should be comparable in price.)

5′ x 5′  of 4 mil clear plastic sheeting (Of a larger roll. It won’t last forever anyway.)

4 pvc clamps (sold as a bag of 5 for ~$1.60, similar to these)

7/16″ dowel x 4′, cut into 2 @ 10″ and 2 @ 14″. (The EarthBox is shallower on the watering tube side.)

2 clothespins

Assembly

1.  Cut the dowel into four pieces. Cut two ~4′ sections of pvc pipe.

2.  Insert the dowels into each corner of the EarthBox. Slide the pvc lengths over the dowels.

3.  Cover with the plastic sheet and clamp. Pin the extra plastic on the ends with a clothespin. The clothespins can also be used to hold the plastic doors on the ends open.

Done!

—–

The postmortem and assorted thoughts:

I think that there must be a better answer for the clamps, though I didn’t want to spend ~$1 each for good spring clamps. I want something that can easily be moved around, so something like spring clamps would be desirable. Still working on the right answer.

The cost could have been lower — My first thought was to build a wooden frame and attach the pvc to it using clamps. That’s the “normal” way to do it. But then I thought, hey, I can just push the pvc into the soil in each corner of the EarthBox. *Then* I did some looking around online — it appears that toxins from the pvc could potentially (likely?) release into the soil. How to deal with that?

I chose to do something similar to the buried rebar — I purchased some 3/8″ dowels, cut them to 1′ length, and buried the dowels in the corners of the box. I then slid the pvc over the dowels, leaving the pvc above the soil. In retrospect that was a no-brainer, but I was so fixated on the wooden frame/external support idea that it never occurred to me use the area within the EarthBox to anchor the pvc tubing.

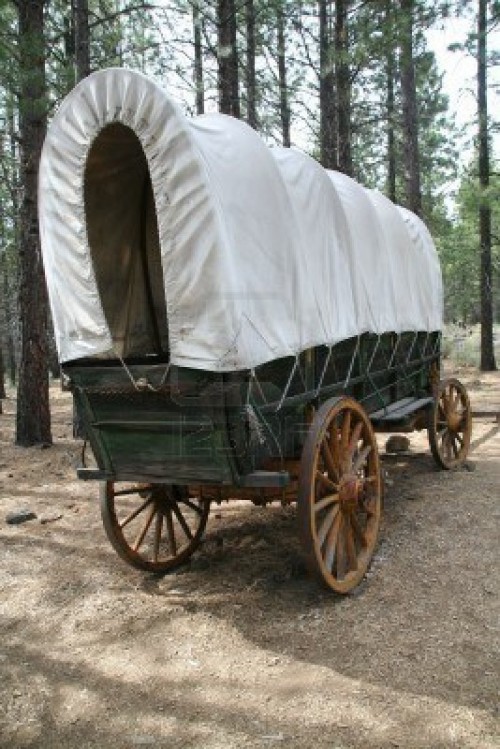
I think it’s interesting that if you were to stick wagon wheels on the sides of the hoop house would look a lot like a covered wagon.

covered wagon

That may mean that it was the right way to do it — form follows function, and both the EarthBox and covered wagon have a similar functions.

Or it’s just a coincidence.

———–

I learned something new. The french “a” thingy is alt and numpad 0226.

The Idiot Auburn Fan

by A.J. Coltrane

There was an Auburn fan who stood to make $50,000 last night had they won the national championship.

Rather than hedge his bet he chose to ride it out, even though Auburn was about a 10 point (or 3-1) underdog.

He got zero dollars.

What he could have done would have been to place a $16,500 on Florida State at -330.

Had Florida State won he would end up with $21,500.

Had Auburn won he still would have had $33,500.

Hedging his bet still would have left him with his home-team rooting interest. He didn’t want to “jinx it”. What an idiot.

Mark Your Calendars, Hop Heads of Seattle

By Iron Chef Leftovers

Twelve Breweries, all doing triple IPA’s, all being served at once.

The breweries:

The venues:

I will most likely make at least one of them, you know, just because I don’t do enough to support my local breweries.

More info here.

Beer of the Week: Unita Sea Legs Baltic Porter

By Iron Chef Leftovers

ssdsadweI am always surprised that breweries coming out of Utah are able to make anything resembling good beer, considering the draconian laws they have around alcohol in that state. Breweries like Unita and Epic have really shown that a brewery can both survive and thrive in that environment. Unita does distribute to Seattle and has some pretty good beers, so a trip to Chuck’s where there was one on tap that I had never seen before – Sea Legs Baltic Porter, was a nice surprise.

From the Unita website:

December 18, 2012 SALT LAKE CITY– Uinta Brewing Company introduces the newest addition to their Crooked Line of beers, Sea Legs Baltic Porter. Sea Legs is a limited release, only 1,500 cases were produced.

Complex and drinkable, Sea Legs delivers flavors of roasted malt and chocolate. Sea Legs was aged in Bourbon Barrels for nearly 12 months adding toasted vanilla and bourbon notes to the flavor profile. This Medium-bodied Baltic Porter has a complex malt profile and mild hop bitterness. With a hidden ABV of 8%, Sea Legs is a siren of a beer.

The beer pours jet black with lots of chocolate, licorice and vanilla dominating the nose with roasted barley hiding in the background. The initial sip yields notes of vanilla with hints of roast before moving into a slightly woody/licorice middle and finally finishing with a long chocolate finish with strong notes of licorice. The wood is somewhat unexpected (and wood I mean like pine rather than oak barrel, which is odd since it is aged in bourbon barrels) and the licorice seems slightly out of balance with the other flavors in terms of dominating them, making this somewhat off-putting. It is an interesting beer and might give it another shot, but it definitely wasn’t one that I would run out to try again.

Unita’s Sea Legs Baltic Porter stumbles into port with 2 broken rudders out of 5.


A Quick And Simple Cracker Recipe

by A.J. Coltrane

For future reference and before the notes evaporate — the cracker recipe for Iron Chef Leftovers’ big dinner party.

These crackers were served with three cheeses and three chocolates selected by ICL. I wanted to go for a cracker that would have good initial crispness but would have a small amount of chewiness as well. They also needed to taste good on their own but not compete with the cheese and chocolate. I think that overall the crackers fulfilled those goals.

This particular recipe is an amalgam of a bunch of different recipes that I looked through online. I ended up choosing this Alton Brown recipe as a loose template, though they’re still very different:

Ingredient This Recipe Alton Brown
AP Flour 8 oz 4-3/4 oz
Wheat Flour 1-1/2 oz 5 oz
Semolina Flour ½ oz
Table Salt 1-1/2 tsp
Kosher Salt 1-1/2 tsp
Aluminum Free Baking Powder 1-1/2 tsp 1-1/2 tsp
Olive Oil 3 TBP 3 TBP
Water 6 oz 6-1/2 oz
Poppy Seeds 1/3 cup
Sesame Seeds 1/3 cup

Instructions –

1. Knead until the dough *just* comes together and the flour is incorporated. (AB calls for kneading “4-5 times”.) Do NOT knead any further — the goal is develop as little gluten as possible. (More gluten = a chewy cracker, and not in a good way.)

2.  Rest 15 minutes. (So that the flour has a chance to hydrate.) Preheat oven to 450 F.

3.  Cut off 1/8 of the dough. Lightly dust the back of a sheet tray with semolina flour. Roll out the dough as thin as you can. Poke the dough all over with a fork. (So that it doesn’t puff up very much when baked.) Using a pizza wheel, cut the dough into cracker-sized pieces.

4.  Bake for 6 minutes on the first side. Rotate the pan and flip the crackers over. (Work quickly.) Bake 4-6 minutes on the 2nd side. Spread the crackers on a cooling rack to cool. Note that they’ll get crispier as they cool.

When we did these we used three sheet trays — one would be baking on the first side, one would be baking on the 2nd side, and one we’d vigorously wave around to cool it off, then prep the next dough to go into the oven.

Tips:

Don’t overwork the dough.

Roll it out super duper thin.

Keep practicing. The recipe makes many batches. By the time you’re on the 5th batch some things will start making more sense and you’ll likely have an “aha!” moment. And then you’ll be done.

Even the less than ideal ones will still taste good.

Feel free to add sesame seeds or poppy seeds or cheese or coarse salt or spices or whatever to make them more interesting. Lightly sprinkle the “topping” over the dough when it’s rolled out and pat it in a little bit. Again, these crackers were intended to be complimentary and not try to hog attention from ICL’s dinner, they’d be somewhat “plain” as-is if eaten solo.

Have fun!

Even More Over the Top Mac and Cheese

By Iron Chef Leftovers

Well, time to revisit the recipe since a number of people asked for it at a New Year’s Eve party we attended at Domanico Cellars. The original recipe is here, but this is the one I specifically made on NYE

The Software

1/2 lb of elbow macaroni

3 tablespoons unsalted butter

3 tablespoons all-purpose flour

1 lb. good quality bacon, preferably thick cut

1 1/2 tablespoon powdered mustard

3 cups whole milk

1/2 cup onion, minced (about 3/4 of a medium onion)

1 teaspoon smoked paprika

1 large egg (lightly beaten)

12 oz Sharp Cheddar  shredded

1 cup panko breadcrumbs

1 teaspoon kosher salt

Black pepper to taste

The Recipe

  • Preheat oven to 350 degrees.
  • Shred the cheese and separate into 2 parts, one containing 1/4 of the cheese and 1 containing 3/4 of the cheese.
  • Cook the bacon, reserving the fat. Mince into 1/4 inch pieces when cooled.
  • Mince the onion. Add to the pan that you cooked the bacon in with 1 tsp of bacon fat and cook over medium heat until browned and slightly softened, about 5 minutes. Remove from heat.
  • Bring 2 quarts of salted water to a boil in a 4 qt pan.
  • Add pasta and cook for about 5 minutes to al dente and drain.
  • While the water is coming to a boil, melt the butter in a 3 qt pan over medium heat.
  • Whisk in the flour and cook until pale blond (about 3 minutes) stirring about every minute.
  • Whisk in onion, paprika and mustard until combined (about 1 minute)
  • Slowly add the milk and cook over medium heat, whisking constantly until slightly thickened, about 7 minutes. Remove from heat.
  • Slowly add 2 ladles full of the milk mixture to the egg, whisking as you add it. This will temper the egg to keep it from cooking and turning into scrambled eggs. I usually do this in a measuring cup. If there are any lumps (i.e. cooked egg), start over with another egg.
  • Add the egg mixture into the pot and stir a couple of times to combine.
  • Add 3/4 of the cheese to the sauce and stir until the cheese is melted, 1-2 minutes.
  • Add the pasta to the sauce and add salt and pepper to taste.
  • Add the bacon to the pasta and combine.
  • In the pan that you cooked the onions, add one tablespoon of bacon fat over medium high heat. Add the breadcrumbs and toss. Cook until they become golden brown, about 4-5 minutes, stirring constantly.
  • Put pasta and sauce in a 4 qt casserole dish, cover with the remaining cheese and breadcrumbs and bake in the over for 20 minutes.
  • Let stand for 5 minutes and serve with your favorite hot sauce (or not)

IMPORTANT – don’t fully cook the pasta – it will finish cooking in the oven and it will be completely mushy if you cook it fully on the stove. Also, don’t rinse the pasta after you drain it.

Notes Timing is important on this recipe, so I highly suggest preparing all of your ingredients before you start cooking – it really makes the job much easier when you are not trying to measure something while watching something else. I also highly recommend freezing the cheese for about 10 minutes prior to shredding – it makes it much easier. The shredding can be done in a food processor or using a box grater. Don’t buy the pre-shredded cheese, it really doesn’t taste the same and shredding yourself will take you 2 or 3 minutes extra and it will be worth it. I really like Beecher’s Flagship Cheese in this recipe, but if you aren’t local to Seattle, you probably won’t be able to find it, so just use your favorite cheddar.  I really like Skagit River Ranch’s bacon for this recipe, but any good quality bacon will work. The pasta and sauce can be made in advance and then put in the oven later – just put it in the casserole dish, covered in the fridge and when you are ready to cook it, remove it from the fridge, uncover and let it sit at room temp for 15 minutes while you warm the oven. The leftovers also make really good fried mac and cheese the next day, that is, if there is any left.