
The Joy of Cooking 75th Anniversary Gingerbread House recipe. I chose this recipe because it seemed to be the simplest dough, or, at least the dough that was the most similar to something that I was familiar with. I treated the house-pieces as crackers and I think that “grounding” helped.
The dough recipe begins with 1 cup (2 sticks) butter melted over low heat. Add 1 cup sugar and 1 cup unsulfured molasses and stir until the sugar dissolves. Let cool to lukewarm.
In a large bowl whisk together 4-1/2 cups AP flour, 1 teaspoon baking soda, 1 teaspoon salt, 1 tablespoon ground ginger, and (I left these out) 1 teaspoon cinnamon and 1 teaspoon ground nutmeg. Make a well in the center and mix in the wet ingredients. Add another 1/2 cup AP flour until the dough pulls away from the bowl. Knead on the counter a few times, wrap in plastic, and move to the refrigerator to fully cool for up to 3 days. I removed the dough from the refrigerator 1 hour before rolling out — I’d suggest allowing 3-4 hours for the dough to come to room temperature instead.
Note: I found this dough too grainy and loose to knead, so I added a couple of tablespoons of water. Interestingly, the recipe thinks the dough may already be too wet and calls for adding more flour if needed…
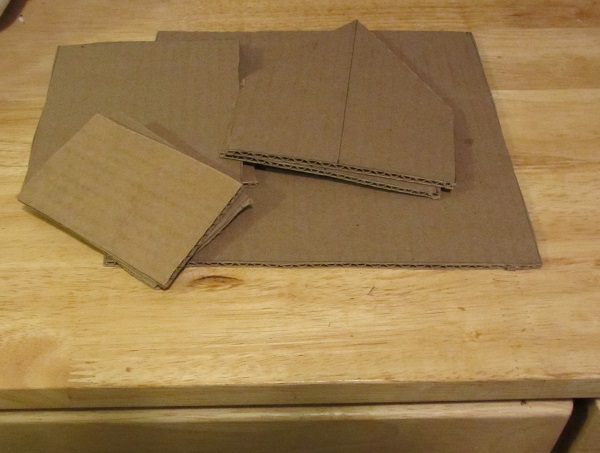
The recipe then asks for cardboard templates. The side walls are 3″ x 4″, the roof pieces are 5″ x 6″, the base is 9″ by 9″. The front and back are awkward — 5-1/4″ wide, the sides go up 3″, then angle to meet in the center that is 6-3/4″ at the peak (the center of the front and back pieces are 2-5/8″ from each side).
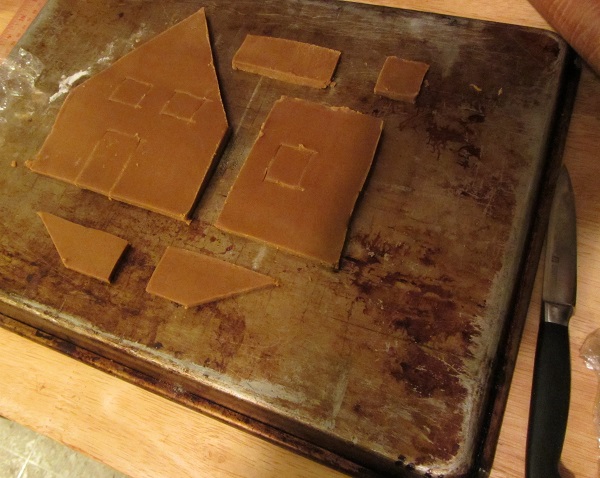
Preheat oven to 350F and set the racks to divide the oven into thirds. Divide the dough into 3rds and roll out one-third on a flat cookie sheet to about 1/4″ thick. Place as many templates as will fit and cut out the shapes, removing the excess. With the knife cut where the windows and doors will go but do not remove these until after baking. Repeat for the remaining dough and templates.
I rolled out to a generous 1/4″ because I wanted to avoid fragile gingerbread drama later. This gave me 3-3/4 “roll-outs”. I used the back of some well-loved sheet trays instead cookie sheets. I made a chimney template using the top of the front piece for reference for the angle — that’s the four non-recipe pieces here:
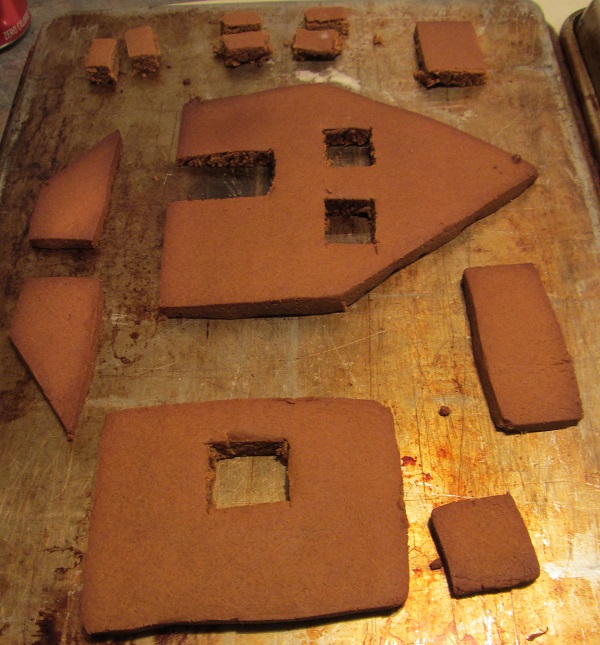
Bake for 12-15 minutes until the color darkens slightly and the pieces feel almost stiff. Since I rolled mine out thicker this took closer to 20 minutes. Remove from the oven.
This recipe (and most other gingerbread house recipes) then call for carefully putting the templates back onto the hot house pieces and cutting away excess. I didn’t do that. I figured: They’d all expanded by loosely the same amount, I wasn’t interested in “perfect”, and that frosting and decorations would cover up most or all of the imperfections. That – and the templates weren’t perfect in the first place.
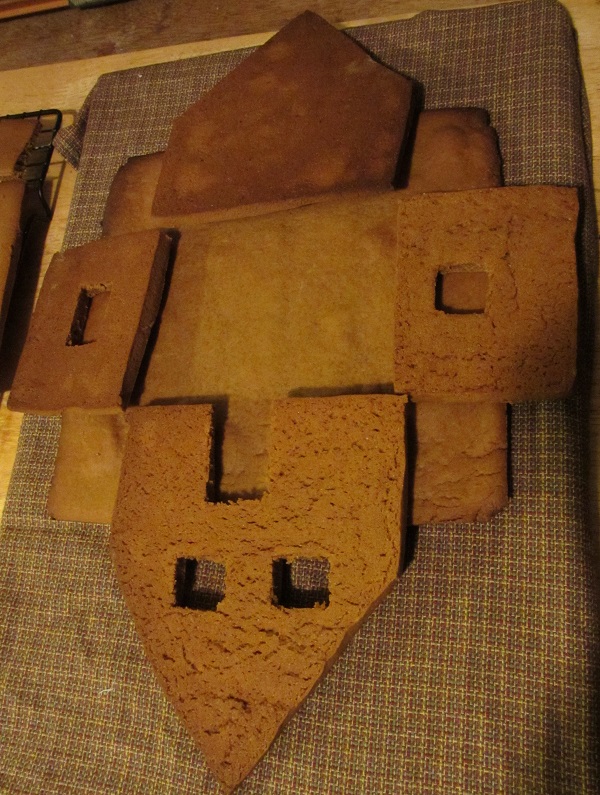
Now is the time to remove the windows and doors. If the window pieces are to become “shutters” then cut them in half. I used an offset spatula to remove the window pieces. I also slid the spatula around the shapes to make sure they didn’t stick to the tray as they dried. When the pieces become mostly rigid transfer to cooling racks to cool completely.
Now for the fun part — assembly!
For a Royal Icing I went with 4 egg whites and 6 cups powdered sugar. Most recipes call for whipping to stiff peaks but not dry. I think I stopped short of stiff peaks, but the finished product had the consistency of toothpaste and was very tacky, and it worked great. I used a one-gallon Ziplock with a small hole cut in one corner (start small, you can always make it bigger.) Twist up the top of the Ziplock to slowly force out the icing. When I wasn’t actively using the bag I set it upside down in a bowl with a little plastic over the hole to prevent the icing from hardening.
Place the base and the four walls as pictured — important note: What were the “top” sides during baking are now laying face down, they’ll “lean up” towards the center to attach together and leave the pretty sides facing out. I have the whole thing on a cutting board that has a “decorative” towel on it. The towel is taped to underneath the cutting board. Add a square of icing to the base where the walls will sit. Add icing to the edge of one wall and affix two walls together. And so on. Wait to add the roof until the four base walls feel solid and have had and hour or two to set.
I put the first icing on the right inside edge of the back wall and butted the side wall against that. It “set” almost right away.
If I had it to do over again I would have made sure to push the house a little further back on the base. It seemed centered, but I would have preferred more front yard.

Next, the roof. (Again, let the walls get really solid first.) I was watching the Great British Baking Show and they used little pieces of toothpick to help hold the roof. (Take 1/4″ end of a toothpick, dig a little hole on the top of the slanted front wall, then flip the toothpick over, put it in the hole, and leave the pointy bit facing up.) That wasn’t necessary for me, but it’s a good tip I think.

I assembled the chimney while I was waiting for the four walls to dry. That way it was totally solid before putting it on top of the house. I waited to add the chimney about an hour after I’d put on the roof, just to make sure the roof was solid.

Next up. Decorating! With mostly leftover Halloween candy –

And the side view again:

What we learned: I think it took around 6 hours of actual work all up. If we’d gone “all out” on decorating I can see where we easily could have put in another 3-6 hours. I think the dough recipe worked out well, and it was nice that it didn’t call for a whole bunch of ingredients.
Overall it was a fun project that I may or may not attempt again, unless I have another block of time off around the holidays. I think if I do try it again I’ll plan for more over-the-top, though I’d bet that could eat a good part of a week.
As a bonus it snowed big flakes while we were building the gingerbread house. The power flickered too. Fortunately we kept the power and most of the snow on the roads was gone by this morning but it was still in the yards. It doesn’t snow much here in the Seattle area — as I write this the neighborhood kids are enjoying the last of the snow with bright sunshine.
Happy Holidays –

no eggs n the gingerbread?
LikeLike
No eggs. You’re basically making big, thick crackers.
LikeLike