Pullman Pan 50/50 Sandwich Loaf, Sticking To The Side Of The Pan With Conviction

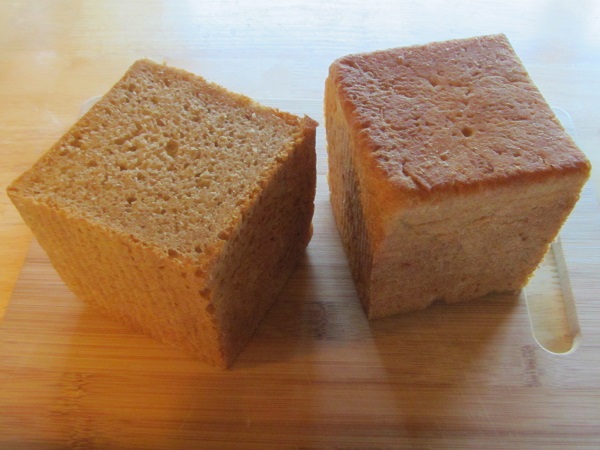
The last few loaves have wanted to stick to the sides of the loaf pan a little bit. This one took the sticking thing a little more seriously:

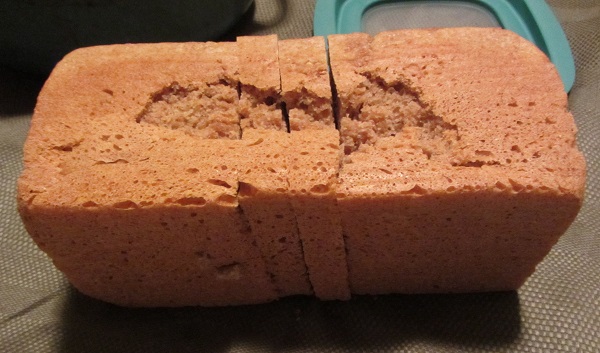
The pans themselves are no longer super duper new, and I haven’t been crazy fastidious about soaking the pans and cleaning out the old residue, so I probably deserved one that failed to release from the side. I did lightly oil the interior of the pan, but it may also need more oil than I’ve been using.

Another thing that might have contributed is the Red Fife flour combined with a longer bulk proof than usual — I let the bulk proof go a full two hours, followed by 45 minutes to an hour in the pan and the Red Fife might have started breaking down somewhat after that much time — I’ve read that Red Fife is prone to weakened gluten structure when given long proofing times. The crumb was more open than usual as well, which may be a sign of something, even if it’s just a looser crumb.

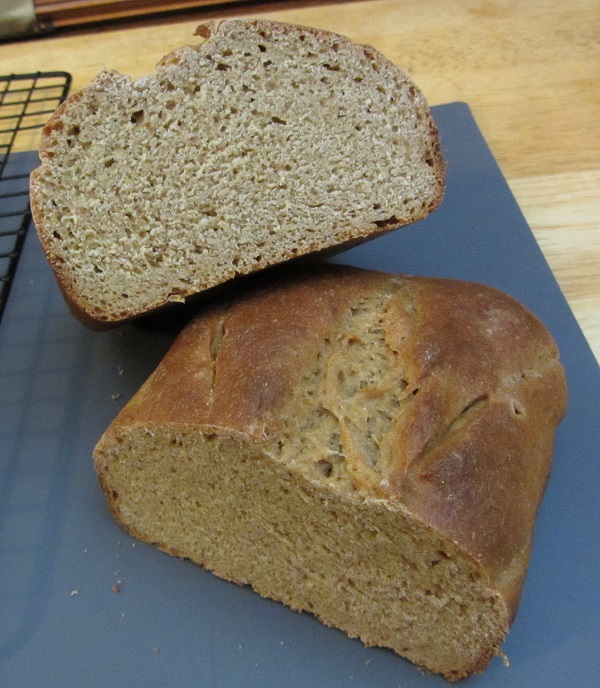
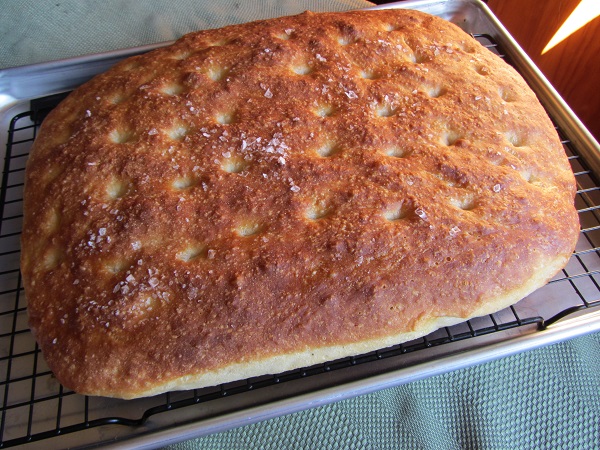
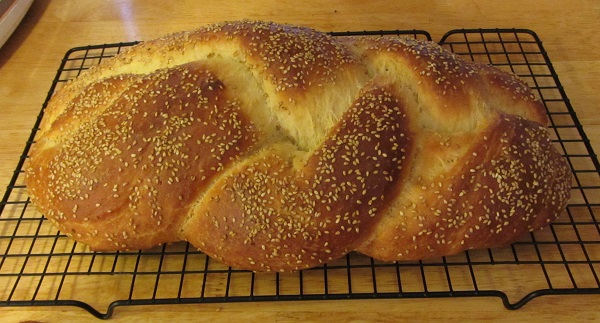
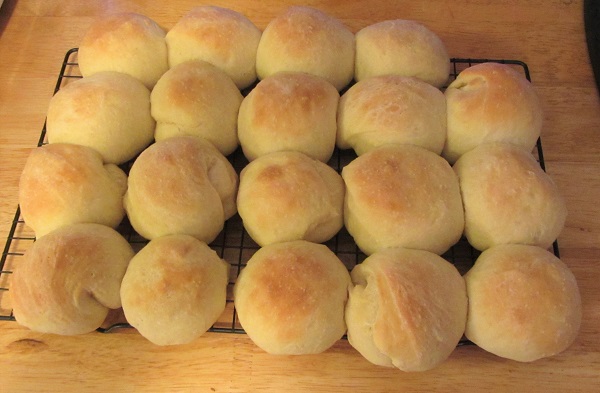
I’ve been experimenting with sometimes using Bread flour rather than AP flour and I’m leaning towards always using Bread flour going forward:

250g Bread flour and 250g fresh-milled whole wheat flour (Red Fife or Rogue de Bordeaux berries), (500g flour weight total). 375g water (75% hydration). 15g honey (3%), 15g olive oil (3%), and 15g (3%) powdered milk. 12g kosher salt (2.4% of the flour weight), 1.5 tsp instant (not rapid-rise) yeast.

Combine all ingredients. Knead on low speed for 8 minutes. (A prior hydration step is a potential and obvious improvement here.)

Cover and let rest one hour (two hours this time) for the dough to hydrate and proof.

Lightly oil the Pullman pan, pan lid, and a rubber spatula. Move the dough to the Pullman pan and spread it out with wet fingers or the spatula. Cover and let rise until 1/2″ from the top of the pan.

Bake at 350F, covered for 30 minutes then remove the cover and bake for another 25 minutes or until the loaf reaches 195-200F.


More edible mistakes. Happy Baking

Pullman Pan 50/50 Sandwich Loaf, the right grains make a big difference

I own Flour Lab by Adam Leonti. On page 71 he presents his Yeasted Loaf recipe, where he suggests a wheat variety: “I like Red Fife”.

At the start of this process I didn’t consult the book, I just picked a Hard Red Winter Wheat from the pantry (Turkey Red) and then adjusted the ratios of the ingredients bake by bake looking for the most suitable bread for sandwiches. No matter what adjustments I made the bread was still vaguely crumbly and lacked the gluten structure and springiness to be a good sandwich bread.

So I got what I deserved. It’s always the better idea to Stand On The Shoulders Of Giants, then riff from there. And I know that, usually.

The bread above is made with Red Fife. It works great as a sandwich bread, and it has a more interesting taste profile than Turkey Red. Rouge de Bordeaux works great too, and to my taste it’s even more intensely flavored, aromatic, and interesting than the Red Fife. Both the Red Fife and the Rouge de Bordeaux taste even better after a couple of days after baking, which may be true for all whole wheat breads. Leonti specifically states in a few places to let the finished bread rest until the next day prior to cutting into it.

The recipe this time is intended to be as quick and easy as possible. I’m sure it can be improved but I was initially curious to see what Red Fife would do with no other steps than would be used with a quick same-day loaf:

250g AP flour and 250g fresh-milled whole wheat flour (Red Fife or Rogue de Bordeaux berries), (500g flour weight total). 375g water (75% hydration). 15g honey (3%), 15g olive oil (3%), and 15g (3%) powdered milk. 12g kosher salt (2.4% of the flour weight), 1.5 tsp instant (not rapid-rise) yeast.

Combine all ingredients. Knead on low speed for 8 minutes. (A prior hydration step is a potential and obvious improvement here.)

Cover and let rest one hour for the dough to hydrate and proof.

Lightly oil the Pullman pan, pan lid, and a rubber spatula. Move the dough to the Pullman pan and spread it out with wet fingers or the spatula. Cover and let rise until 1/2″ from the top of the pan.

Bake at 350F, covered for 30 minutes then remove the cover and bake for another 25 minutes or until the loaf reaches 195-200F.


Having poked around some bread forums, it seems I’m not alone in my experience that “Turkey Red Is Sort Of Crumbly And Maybe Not The Best Variety For Bread”. I’m not sure if I’m going to re-purchase it when I run out. For a Hard Red Winter Wheat it’s relatively neutral tasting, and I didn’t love the gluten structure. It may still be useful in situations where strong gluten or an assertive flavor is not desirable, so I’ll focus on using it other places before I make a final decision.

Happy baking

Pullman Pan 50/50 Sandwich Loaf, the ingredients are sort of set?

I’m pretty happy with the loaf at this point. It’s still vaguely more crumbly than I’d prefer, but the rest of it is good. The left-half has the crumb facing up:

It’s 250g AP flour and 250g fresh-milled whole wheat flour (heritage Turkey Red berries), (500g flour weight total). 375g water (75% hydration). 15g honey (3%), 15g olive oil (3%), and 50g (10%) powdered milk. 10g kosher salt (2% of the flour weight), 1.5 tsp instant (not rapid-rise) yeast.

As far as changes from where it started, it’s just been a continuous reduction in oil and honey from the original. The kneading has been cut way back. And the dough now goes directly from the mixing bowl to the Pullman pan. The current recipe:

Combine all ingredients. Knead on low speed for 1-2 minutes or until the dough comes together.

      Cover and let rest one hour for the dough to hydrate.

      Mix for 1-2 minutes. Cover and bulk rise until doubled.

      Lightly oil the Pullman pan, pan lid, and a rubber spatula. Move the dough to the Pullman pan and spread it out with wet fingers or the spatula. Cover and let rise until 1/2″ from the top of the pan.

      Bake at 350F, covered for 30 minutes then remove the cover and bake for another 25 minutes or until the loaf reaches 195-200F.

      I think to a degree I’m at a bit of a inflection point for further improvements. I’ve tried a moderate amount of mixing and very little mixing, and the “little mixing” seems to work better. It may be that combining at least the flour with the water overnight in the refrigerator (or possibly all of the ingredients) may allow for a better finished product. Another obvious change would be to sift the biggest chunks of bran out of the whole wheat flour, though that’s something I don’t want to do, both for the loss of nutrients and the bit of hassle and things to clean up afterwards.

      It may also be that Turkey Red isn’t the best grain from this application. I still have Rouge de Bordeaux and Red Fife to try out.

      So it feels like more upcoming process changes, to what, I’m not sure. Which is a fine problem to have, relatively.

      Happy baking

      Pullman Pan 50/50 Sandwich Loaf: Getting Closer

      The newest formula is getting closer. The mouthfeel and taste are good. The crumb is still just a bit more crumbly than I’d prefer. An early morning picture of the top of today’s turkey sandwich:

      It’s 250g AP flour and 250g fresh-milled whole wheat flour (heritage Turkey Red berries), (500g flour weight total). 375g water (75% hydration). 25g honey (5%), 15g olive oil (3%), and 50g (10%) powdered milk. 10g kosher salt (2% of the flour weight), 2 tsp instant (not rapid-rise) yeast.

      Knead on low speed for 10 minutes. Cover and bulk rise until doubled. Flour the bench, the dough will be sticky. Pre-shape the loaf then move it to the Pullman pan. Cover and let rise until 1/2″ from the top of the pan. Bake at 350F, covered for 30 minutes then remove the cover and bake for another 25 minutes or until the loaf reaches 195-200F.

      As for changes relative to the first attempts — I upped the milk powder and yeast and decreased the olive oil and honey. The increased milk powder is giving a better mouthfeel. The yeast is making the process a lot faster. The decreased honey is softening the crust, which is an improvement. I’ve decreased the oil and I haven’t missed it, so I left the quantity lower than the original 8% of flour weight.

      I think the final piece of the puzzle may be either:

      1. Combining the ingredients briefly, then letting the dough rest before mixing again — letting the fresh milled wheat hydrate before the actual kneading.
      2. Kneading for a shorter time, about 4 minutes, then doing a series of folds in the bowl to promote gluten formation more gently than the mixer will do it.

      I think the recipe part of the equation is very close. Now it’s the handling technique that needs to be better. That’s part of the fun of bread baking though — figuring out solutions. Which of course never ends.

      Happy baking

      A No Knead Bread And Seasoning A Banneton

      First a picture of Sunday’s No Knead bread then a little background.

      I’ve owned a banneton for at least eight years. I know that because I have a blog post from 2016 that talks about me baking with two of them. Somehow I never got the message that they’re supposed to be seasoned to prevent sticking. The ones I purchased didn’t come with instructions. I just happened to be reading about a banneton related topic and a very small light bulb went off in my head. So I thought I’d see what banneton care and feeding was supposed to be.

      Bannetons are supposed to be seasoned. The method is:

      1. Spritz the banneton with oil or water. (I lightly rinsed mine in water then shook it out well — I didn’t want oil going rancid at some point.)
      2. Sprinkle some AP flour or rice flour or a combo of the two into the banneton and angle it around until the flour coats the inside. Shake out the excess flour.
      3. Use a little more flour with every bake.
      4. Air dry the banneton after every use, preferably in the sun to prevent any unwanted molds from populating the flour.
      5. Store the banneton in an airtight bag or container to keep bugs from taking up residence.
      6. If too much flour builds up then sweep it out with a stiff brush.

      That’s it. Any crevices or tiny cracks in the banneton are now basically non-stick.

      Below is another picture of that same bread because I couldn’t decide which I liked better. The light is from the back rather than the side.

      The bread is 75% hydration with no additional “handling flour” added to the dough itself and it didn’t stick at all. (Recipe here. Or use the Menu above to go to the No Knead page.)

      Other notes — I’ve stopped using bench flour or a Silpat when preparing a No Knead — I use a tablespoon or two of oil on the counter and spread it around with a paper towel. If the dough tries to stick to the counter I just lift the dough with a bench scraper, though generally it doesn’t stick.

      The other advantage of using oil on the counter is that I can then used the oiled paper towel to rub a bit of sheen on any other tools that are coming into contact with the dough. I rub a little on a spatula to help remove the dough from the mixing bowl to the counter. I rub a little on a serrated bread knife for any slashes that I want to make on the dough prior to baking. In the picture above I used five slashes around the “waist” of the dough, the splits on top were caused the dough naturally expanding where the seams were gathered up as the dough was placed into the banneton. I also used a Le Creuset bread oven rather than a traditional dutch oven for this bake — that made it so I could easily get to the sides of the dough after it was removed from the banneton.

      I’ve gone years of using bannetons with some trepidation and drama for no real reason. Here’s celebrating finally learning something, even if it was mostly by chance.

      A Pullman Pan 50/50 Sandwich Loaf: Searching For Goldilocks.

      600 grams of flour was too much. 400 grams of flour was not enough. This bake uses 500 grams of flour and adjusts the other secondary ratios somewhat.

      The recipe uses 250g AP flour and 250g fresh-milled whole wheat flour, (500g flour weight total). 375g water (75% hydration). This time around I cut back on the “other stuff”: it uses 30g each of honey, olive oil, and powdered milk (all are 6% of the total flour weight, the old amounts had been 8%). 10g kosher salt (2% of the flour weight), 1 tsp instant (not rapid-rise) yeast. Bulk rise until doubled then move to the Pullman pan, cover and let rise until 1/2″ from the top of the pan. Bake at 350F, covered for 30 minutes then remove the cover and bake for another 25 minutes or until the loaf reaches 195-200F.

      It’s sort of based on King Arthur’s A Smaller Pain De Mie. Or at least it was at the beginning of tinkering.

      The newest version uses relatively less honey, olive oil, milk powder, and yeast. This is intended to make the end of the rise a little more predictable and controllable — with the earlier versions there wasn’t a ton of activity for the first 60 to 90 minutes, then things started to happen fast after that.

      It should be more manageable but we’ll see how it tastes and ages after a few days. It may be the correct answer will be to restore “other stuff” to the original 8% and just cut back on the yeast and expect the whole pre-bake process to go slower and longer. I feel like it’s getting close to where it should be.

      Happy baking

      A Smaller 50/50 Sandwich Loaf

      This time I used a total of 400 grams of flour and let the bread continue to proof to see how high it would rise. It never made it near the top of the Pullman pan and the bread wound up overproofed. It was otherwise tasty and fine, just not pretty. I’m still adjusting the quantity of flour and proofing time.

      The formula is (again) based on King Arthur’s A Smaller Pain De Mie. (With some extensive modifications.) 200g AP flour, 200g whole wheat flour, (400g flour weight total). 300g water (75% hydration). 32g each honey, olive oil, and powdered milk (all are 8% of the total flour weight). 8g kosher salt (2% of the flour weight), 1 tsp instant (not rapid-rise) yeast. Bulk rise until doubled then move to the Pullman pan, cover and let rise until 1/2″ from the top of the pan. Bake at 350F, covered for 25 minutes then remove the cover and bake for another 22 minutes or until the loaf reaches 195-200F.

      The baking times are longer than in the original recipe but that seems to be how long it takes.

      The next bakes will center on 450-500 grams of flour. Hopefully that’s the “sweet spot”.


      Many of years of blogging and this is my first post on a February 29th.

      Happy Baking

      The New Pullman Pans And A 50/50 Sandwich Loaf

      I recently purchased a pair of 9 x 4 x 4 Pullman Loaf Pans with the idea that I’d make sandwich loaves for lunches at work. The Pullman pans are good for other breads too but sandwich loaves were the main impetus for the purchase. Coincidentally.. on January 12 Dave at HappyAcresBlog posted about his year of bread baking and mentioned that in 2010 they’d decided to bake all of their own bread for the year and they’ve kept it up since then.

      Which made me think, why not us? We have the materials and knowledge and it’s not really that time consuming. It would mean redirecting energy (or lack of energy) on Sundays but we’d gain the benefit of fresh baked healthy breads. It’d give me a reason to bake something with fresh milled wheat berries more regularly.

      As of right now I’ve settled on a sandwich loaf with 50% AP flour and 50% fresh milled wheat. Today’s bread utilizes a Hard Red Spring wheat:

      The small crack along the top is where I slashed the dough. As it turns out the bread doesn’t need a slash and won’t receive one next time.

      The jumping off point for today’s formula is King Arthur’s A Smaller Pain De Mie. (With some extensive modifications.) 300g AP flour, 300g whole wheat flour, (600g flour weight total). Then to make it easy to remember: 450g water (75% hydration). 48g each honey, olive oil, and powdered milk (all are 8% of the total flour weight). 12g kosher salt (2% of the flour weight), 2 tsp instant (not rapid-rise) yeast. Bulk rise until doubled then move to the Pullman pan, cover and let rise until 1/2″ from the top of the pan. Bake at 350F, covered for 25 minutes then remove the cover and bake for another 15 minutes or until the loaf reaches 195-200F.

      This is my 3rd or 4th attempt using these pans and it’s the first time the finished bread has gone all the way to the top of the lid. My feeling is that the previous attempts used too little flour, or I didn’t proof the dough long enough given that the house temperature sits in the high 60’s this time of year. This time I let the dough rise in a warm part of the kitchen near a heater vent and that seemed to help out quite a bit.

      As for the upcoming iterations: It may be that closer to 500g of total flour will make a better loaf. I’ve also seen orange juice recommended for a small percentage of the water which is supposed to cut the “wheaty taste”, so that might be something to try just to see. How long to leave the bread covered in the oven will be another variable that needs to be looked at, the water needs to evaporate out, especially at the high hydration that I used on this bake.

      Overall: Success with room for growth.

      Late edit, February 24: 600 grams of flour is defintely too much. This week the dough rose much more than usual and it expanded in the oven so much that the dough extruded in a thin sheet about a foot long out of one end of the pullman pan. Which fortunately didn’t make a mess or catch on fire. 400-500 grams of flour is more the correct.

      —-

      The loaf pans are manufactured by USA Pan. They receive good reviews everywhere I’ve looked and they’re working well for us so far. The pans were sold as one for $42 or a pair for $45. We now own two pans.

      An Easy And Good 100% Einkorn Sandwich Loaf

      I received a bag of Bluebird Grain Farms Organic Einkorn Flour as a gift during the holidays so I thought I’d try a 100% Einkorn flour sandwich loaf. I’ve baked with Einkorn before, though it’s been a while. In addition to “regular” flour and heirloom wheats I sometimes feel the need to try baking with spelt/ rye/ einkorn/ etc — I tend to rotate through many different types of flours, as well as the using whole wheat flours from the heirloom berries we’re grinding in the kitchen. Any and all of the non “regular” flours have more character and are more interesting than the processed white stuff.

      The rise and oven spring weren’t quite what I’d hoped for, but that was to be expected since I didn’t mix in any other flours. The bread was still tasty and moist, I just had to make smaller than usual sandwiches.

      The recipe: 400 grams Einkorn flour, 130 grams water, 130 grams milk (65% hydration not accounting for the milk solids), 8 grams honey (2%), 8 grams kosher salt (2%), 1.5 teaspoons instant (not rapid-rise) yeast.

      Mix on low speed for 6 minutes. At this point the dough will be very sticky. Cover and let rest two hours. Move the dough to a lightly oiled loaf pan. (The dough was very manageable at this point and not very sticky at all so I gave it a few stretch and folds between my hands.) Preheat the oven to 375F. Cover the pan and let rise another 30 minutes. Slash the dough. Bake ~35-40 minutes or until 195F+ internally. Cool on a rack.

      Other than the lack of oven spring/height it was a good result. I still have about a pound of Einkorn to use up — Next time I’ll try a 50/50 ratio with bread flour to see if it makes a more “proper” sandwich bread. I’ll probably also bump the total flour weight to 600 grams to more completely fill out the loaf pan. I may also try a longer rise in the pan.

      Added bonus: Bluebird Grain Farms is pretty near to north Seattle, and it’s always a plus to support local farms.

      (I’m not affiliated with or compensated by Bluebird in any way. It’s local farmers doing good stuff with ancient and heirloom grains.)

      Happy baking

      A Focaccia, A Braided Challah, And Sort Of King Arthur Big Batch Quick Dinner Rolls

      Three breads over three days. I started the day before the first bakes by making two poolishes.  One was made with AP flour, the other was bread flour. Each contained 600g flour and 600g water — 2400 grams in total. Both poolishes received a 24-hour rise on the counter. At that point I made the (below) challah and dinner rolls, but that didn’t use up all of the poolish. The remaining poolishes went into the refrigerator and three days later were used up in this focaccia:

      The leftover poolishes totaled 1000 grams; right around 500g of the AP poolish and 500g of the bread flour poolish. In theory that means what remained contained 500 grams of water and 500 grams of the mixture of flours. 

      To that I added 500g bread flour, 250 grams water, 20 grams kosher salt, 30 grams olive oil, and 2 teaspoons of instant (not fast acting) yeast.  The bakers percentages come out to 75% hydration, 2% salt, 2% oil. Mix everything for 8 minutes, then cover and allow to rise for two hours. De-pan to an oiled and parchment-lined sheet tray. Oil the top of the dough, poke into the dough all over with your fingers, and cover and let rise another hour. Prior to baking sprinkle on flaky salt, rosemary, or whatever topping is preferred. Bake at 450F for 25-35 minutes. I used an additional sheet tray to the bottom to prevent the bottom from getting too dark.

      Next up, but baked first in reality is the challah.

      Historically I’ve used either a Michael Ruhlman recipe or a Peter Reinhart recipe. The link to the Ruhlman recipe that I’d refer to was broken so I went with: ~800g poolish (400g bread flour, 400g water), an additional 400g bread flour, 1 egg + 1 yolk (reserve white for egg wash), 50g water, 50g room temperature butter, 14g kosher salt, 2 teaspoon instant yeast. Mix for 8 minutes on low speed. Cover and let rise 1.5 hours. Divide into three braids about 18″ long. Braid. Cover and let rise 1 hour. Make an egg wash of the egg white + 1 TBP water. Brush over the challah, sprinkle on sesame seeds. Bake 30-40 minutes at 425F. I should have used a 2nd sheet tray under this one, the bottom was vaguely overdone though nobody complained.

      Last up are the dinner rolls, which were based on this King Arthur Big Batch Quick Dinner Rolls recipe. The differences were that I was using an AP flour poolish. And I didn’t want them quick.

      1. minutes until a soft, smooth ball of dough is formed. The dough should feel elastic and slightly tacky to the touch.
      2. Lighly oil the dough and the bowl and let rise for 1-2 hours at room temperature or until the dough is full and puffy.
      3. You can place the rolls into one Silpat lined (or parchment lined) sheet tray.
      4. After the rolls are in the tray, cover with an inverted sheet tray and let rise at room temperature for another 1-1.5 hours, or until well rounded and full looking. Preheat the oven to 350°F.
      5. Bake the rolls for 20 to 25 minutes or until golden brown and an internal thermometer reads 190°F. You can brush the baked rolls with melted butter if desired. (I chose not to, since I wasn’t serving immediately. We reheated the rolls for serving.)