King Arthur Baking Dutch Oven Dinner Rolls

King Arthur Baking Dutch Oven Dinner Rolls. Recipe is here

2025 Thanksgiving modifications:

All of the water (227g) , milk powder (28g), 70g whole wheat flour (Sonora White), 157g AP flour, and a tiny tiny pinch of active dry yeast were combined into a poolish, covered, and refrigerated for 2 days. I also removed the butter from the refrigerator at that time to ensure it was room temperature when needed.

About 4-5 hours before time to bake, combine the rest of the ingredients (including the remaining 127g AP flour) and mix until a smooth ball of formed.

The recipe calls for a total of 350g flour, one half AP and one half whole wheat. I used 20% of the total flour weight as fresh milled Sonora White flour.

The rest of the recipe was used as directed except that I baked 10 minutes covered and 13 minutes uncovered. I have found that 15 covered and 10 uncovered leaves the tops relatively light.

The poolish and Sonora White combined nicely to make smooth but interesting on their own dinner rolls.

Levain Starter – Evolutions In Bread By Ken Forkish

A few months ago I decided to begin maintaining a starter. To that point I’d avoided it, partly because I didn’t want Another Living Thing to maintain, partly because the idea of throwing away starter seemed wasteful, and partly because it just felt like it was going to be a messy and unnecessary hassle.

Hanging with the salsa.

The flip side of maintaining a starter would be that it would allow for more interesting things to try with breadmaking. It would also add another “color” to my available “palette”. The end product could be better tasting, better for us, and keep longer before spoilage. Ultimately I read enough intriguing starter-based recipes that I decided to give maintaining a starter a try so I took the leap.

I wanted a starter recipe that wouldn’t consume or waste much flour. I also wanted a starter recipe I could mostly ignore after it was finished. I settled on Ken Forkish’s Levain recipe from Evolutions In Bread. The entire process requires one week and 550 grams of flour.

Creating the starter is pretty simple really. Weigh the container and write that number down. Every 24 hours some amount (by weight) of the contents of the jar will be discarded and then the container will be fed a small amount of fresh water and flour. I made the decision ahead of time to mill all of the whole wheat flour I was going to need, 250 grams total. That way I wasn’t getting the mill out for the first few days when it was time to discard and feed. The process felt very easy and pretty bulletproof — I think that fresh milled whole wheat contains enough nutrients and enough bacteria/enzymes/assorted microbes and whatnot that kicking off the new tiny ecosystem basically took care of itself.

The recipe it calls for 250 grams of starter as the end product. I “shorted” the final feeding and I didn’t see any adverse effect. I did that because I wanted to be able to pull a smaller amount out of the jar each week and still keep things fresh and lively with smaller feedings. If I want to build up a large quantity of starter it takes a little longer but I’m fine with that.

I maintain 150 grams of starter in a 393 gram jar (weighed with no lid). Each week I take a small spatula and scrape/pour out 100 grams for bread baking. I then add 50 grams of bottled water and 50 grams of bread flour to the container, scrape down the sides, and stir it up. I put the lid back on and let it sit on the counter for 1-2 hours, until it starts to show some signs of life. Then it goes into the back corner of the refrigerator for another week. I store yeast in a tupperware-type container on top of the starter. Everything is in one place and ideally staying fairly cold.

As for the container – it became clear pretty quickly that straight sides are a good thing and a threaded jar is a bad thing. Straight sides because it’s much easier to get into and scrape down the jar when there’s no “neck”. Threads just gather crud and rapidly clog. I purchased a 6-pack of the Weck 743 jars and split it with a friend who was also making a new starter. (At the time the total cost was ~$6.50 per jar for six.) I use them without the gasket. They’re nice somewhat heavy jars made of thick glass. The lid just sits on top and it’s plenty secure.

Final thought: Evolutions in Bread is a great book. Highly recommended.

Restocking The Wheat Berries

Rogue de Bordeaux recently came back into stock, so it was time for another order of wheat berries from Breadtopia. I ordered two bags of that variety because it has a wonderful rich smell and taste, a five pound bag wouldn’t last long.

Delivering a heavy package from Iowa to the Pacific Northwest — freight isn’t cheap. I used that as excuse to splurge on some of the not-inexpensive varieties such as the Kamut and the Durum. I’ve been meaning to bake this Whole Spelt Sourdough Bread from the Breadtopia site so Spelt went into the shopping cart as well.

Rounding out the order was a bag of Rye, a bag of Red Fife, and a bag of Yecora Rojo. All of that will join the Turkey Red, Sonora White, and other smaller quantities of berries already in the pantry. The weekly sandwich loaves are usually one of Red Fife / Yecora Rojo / Turkey Red / Rogue de Bordeaux, with the Yecora Rojo delivering the most consistently good results for a tightly crumbed and elastic slice of bread.

I’d love to be able to buy these closer to home, but the relatively local places don’t sell many varieties of berries, they mostly just sell flours. I’m little surprised they don’t also bag and distribute the berries, I’m assuming it’s a value-add thing for the mill.


This is the first post with the new laptop. This blog and the previous title (CheapSeatEats) have now seen at least two other laptops come and go, maybe three. There were a few new things to learn with handling and resizing photos but it’s really nice not having to wait for things to spin up so that I can get on with the writing. I’ll be interested to see what the photos look like when viewed from the web. I cropped to the same size as usual and it looks grainy in the preview, so that may need some attention later on.

I’ve also read that Kamut is super hard and may initially cause the Mockmill 200 to discharge some millstone into the flour. We’ll see how that goes.

Now to figure out where it’s all going to live in the pantry.

King Arthur Epi de Ble and Dutch Oven Dinner Rolls. And A Couple Of No Kneads.

I went a little over the top with the Thanksgiving breads this year: A 1.3x batch of King Arthur’s Epis de Ble, two batches of King Arthur’s Dutch Oven Dinner rolls, and two No-Knead breads. All of that for nine people. I started at 4:30am and finished around 11am.

I made a couple of changes to the Epi de Ble recipe. I increased the total flour weight to 620 grams and used bread flour instead of all purpose. This made four epi. The poolish was changed to incorporate all of the water — 403 grams water and 403 grams flour. The total formula included 63% water, 2% salt. King Arthur original recipe here.

I made a double batch the Dutch Oven Dinner Rolls and modified that recipe slightly as well. All of the water (227g x 2 = 454g) and 454g of the flour were included in poolish that spent three days in the refrigerator. And I used 2% salt by weight. King Arhur recipe is here.

Finally, I made two No-Kneads using the recipe in the header at the top of the page.

I think overall everything came out a little bit lighter colored than usual — I put a sheet tray in the bottom of the oven so that none of the bottoms would get too dark. It had the side effect of not allowing the breads to deeply brown either, but I thought it was a reasonable tradeoff and nobody seemed to mind.

It was basically five individual bakes, so I made a chart of when everything needed to be handled, mixed, or if the oven needed a temperature change for the upcoming items. With that many things happening I was glad I did, and I didn’t wind up with any timing conflicts.

Next year I’m going to make half as much stuff and get more sleep.

Happy Baking

A Focaccia, A Braided Challah, And Sort Of King Arthur Big Batch Quick Dinner Rolls

Three breads over three days. I started the day before the first bakes by making two poolishes.  One was made with AP flour, the other was bread flour. Each contained 600g flour and 600g water — 2400 grams in total. Both poolishes received a 24-hour rise on the counter. At that point I made the (below) challah and dinner rolls, but that didn’t use up all of the poolish. The remaining poolishes went into the refrigerator and three days later were used up in this focaccia:

The leftover poolishes totaled 1000 grams; right around 500g of the AP poolish and 500g of the bread flour poolish. In theory that means what remained contained 500 grams of water and 500 grams of the mixture of flours. 

To that I added 500g bread flour, 250 grams water, 20 grams kosher salt, 30 grams olive oil, and 2 teaspoons of instant (not fast acting) yeast.  The bakers percentages come out to 75% hydration, 2% salt, 2% oil. Mix everything for 8 minutes, then cover and allow to rise for two hours. De-pan to an oiled and parchment-lined sheet tray. Oil the top of the dough, poke into the dough all over with your fingers, and cover and let rise another hour. Prior to baking sprinkle on flaky salt, rosemary, or whatever topping is preferred. Bake at 450F for 25-35 minutes. I used an additional sheet tray to the bottom to prevent the bottom from getting too dark.

Next up, but baked first in reality is the challah.

Historically I’ve used either a Michael Ruhlman recipe or a Peter Reinhart recipe. The link to the Ruhlman recipe that I’d refer to was broken so I went with: ~800g poolish (400g bread flour, 400g water), an additional 400g bread flour, 1 egg + 1 yolk (reserve white for egg wash), 50g water, 50g room temperature butter, 14g kosher salt, 2 teaspoon instant yeast. Mix for 8 minutes on low speed. Cover and let rise 1.5 hours. Divide into three braids about 18″ long. Braid. Cover and let rise 1 hour. Make an egg wash of the egg white + 1 TBP water. Brush over the challah, sprinkle on sesame seeds. Bake 30-40 minutes at 425F. I should have used a 2nd sheet tray under this one, the bottom was vaguely overdone though nobody complained.

Last up are the dinner rolls, which were based on this King Arthur Big Batch Quick Dinner Rolls recipe. The differences were that I was using an AP flour poolish. And I didn’t want them quick.

  1. minutes until a soft, smooth ball of dough is formed. The dough should feel elastic and slightly tacky to the touch.
  2. Lighly oil the dough and the bowl and let rise for 1-2 hours at room temperature or until the dough is full and puffy.
  3. You can place the rolls into one Silpat lined (or parchment lined) sheet tray.
  4. After the rolls are in the tray, cover with an inverted sheet tray and let rise at room temperature for another 1-1.5 hours, or until well rounded and full looking. Preheat the oven to 350°F.
  5. Bake the rolls for 20 to 25 minutes or until golden brown and an internal thermometer reads 190°F. You can brush the baked rolls with melted butter if desired. (I chose not to, since I wasn’t serving immediately. We reheated the rolls for serving.)

Pigs In A Blanket

Pigs In A Blanket, using a slightly modified pizza dough recipe for the blanket:

The dough:  250 grams AP flour, 150 grams water (60% hydration by flour weight), 5 grams honey (2%), 30 grams olive oil (10%), 5 grams kosher salt (2%), 1 teaspoon instant yeast.

Mix for 8 minutes on low speed.

Cover and let rise one hour.

My four hot dogs were 6″ long, so I rolled the dough into a rectangle 24″ long. Lay the hotdogs lengthwise into the rectangle, roll them up, then cut the hot dogs into quarters. I used a serrated knife and a light touch.

Set the Pigs In A Blanket on end in a Silpat-lined baking sheet, cover with an inverted baking sheet, and let rise one hour.

Note:  I set them on end because I thought it would allow the dough to rise more evenly around the hot dogs. What wound up happening in reality is that the dough slumped down around the hot dogs and only part of that height was regained with baking oven spring. For more traditional Pigs In A Blanket the hot dogs should be laid on their sides. (However, the rise was nice and even around the hot dogs, so that was good.)

Preheat the oven and bake at 375F for 15-20 minutes or until lightly golden and the dough gives resistance when poked.

Thoughts:

Basically every recipe online calls for opening a can of dough, cutting the dough into triangles, wrapping that around the protein, then baking for 12-15 minutes. And that’s fine. I think comparing the total hands-on time between “the can” and “from scratch” it’s not dramatically different. Assembling the ingredients from scratch takes an extra few minutes but by the time we’ve fiddled around with wrapping hot dogs in dough — what’s an extra five minutes or so?

As with all Pigs In A Blanket, these were devoured in short order.

Previous Pigs In A Blanket post here.

An Italian Tomato Pie – Pizza – Focaccia Made With Fresh Milled Wheat

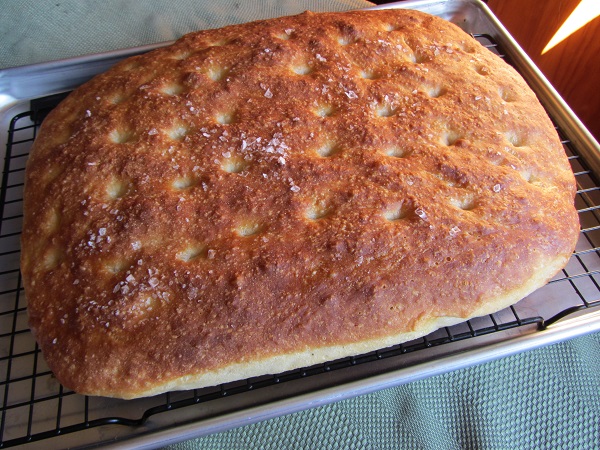
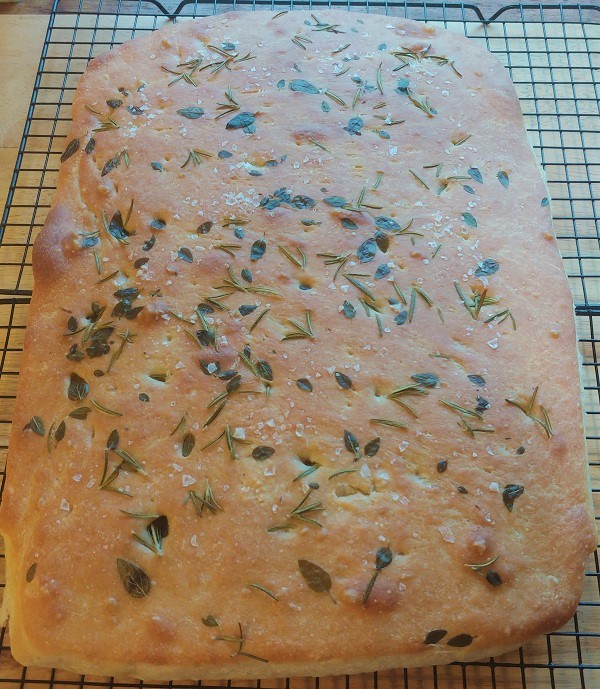
A weeknight dinner pizza loosely in the style of an Italian Tomato Pie / Focaccia:

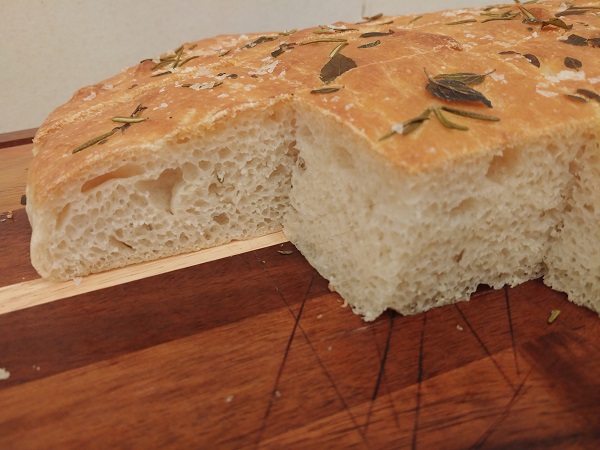
Topped with cupping pepperoni, goat cheese, and a red sauce made from our garden’s tomato sauce, basil, and oregano. The dough was very airy and light with mostly small holes in the crumb. It was baked on a sheet tray with lightly oiled parchment paper, so the bottom got a nice crispiness. The top had just a little crunch too. It was definitely rustic.

The Ingredients:

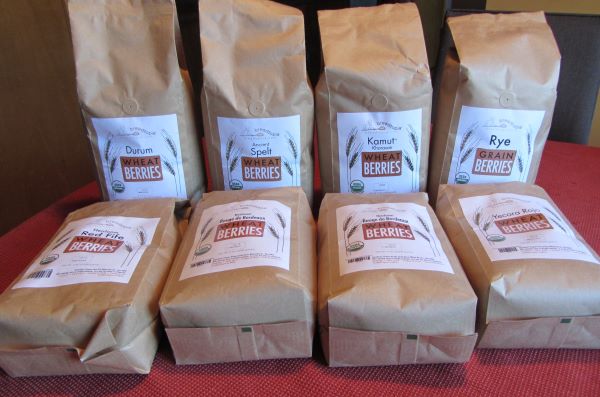
400 grams AP flour. 100 grams Hard White Winter Wheat flour (milled in our Mockmill). 500 grams flour total.

315 grams room temperature water (baker’s percentage 63% hydration)

15 grams honey (3%)

15 grams extra virgin olive oil (3%)

10 grams kosher salt (2%)

2 teaspoons instant yeast (not rapid rise)

The Handling:

Combine all ingredients and mix on low speed for 6 minutes.

Briefly finish kneading and shaping the dough into a ball.

Lightly coat a bowl with oil, cover and let rise 45 minutes.

Stretch and fold the dough, re-form into a ball, cover and let rise another 45 minutes.

Line a sheet tray with parchment and lightly oil the surface of the parchment. Transfer the dough to the parchment and lightly stretch it out, leaving it 1/2 inch to 1 inch thick. 500 grams of flour won’t stretch all the way to the edges of the sheet tray and that’s ok.

Dimple the dough all over with your fingertips. Turn on the the oven to 450F. Cover and let rise one hour.

Top with the tomato sauce and pepperoni. Bake at 450F for 15-18 minutes, or until the top begins to brown and the dough feels like it’s near baked when tapped. It will feel somewhat rigid and hollow. Top with the goat cheese and cook another 3-5 minutes.

Let the pizza rest, then cut into squares.

Thoughts:

If the bottom had cooked any further than it did it would have been overcooked. Adding an extra sheet tray to the bottom half-way through the bake likely would have created a slightly less “done” result. It’s something to keep an eye out for next time.

For an improvised dough, the finished product came out pretty much like what I’d visualized, so I was happy with that. It was very rustic but light at the same time. There were just enough toppings to make it interesting but not so many that the dough didn’t shine through.

One nice thing about using white wheat berries is that they don’t announce themselves like red wheat berries do. It’s more of a subtle backstory that adds depth and “what is that flavor?”

At some point I’ll need to try a 2-3 day cold ferment instead of the weeknight-gotta-get-dinner-on-the-table room temperature approach.

Overall it was somewhat unusual and definitely enjoyable. Win.

Herbed Focaccia With Poolish

One of our holiday traditions is attending a pot luck / lasagna party hosted by a good friend of ours. I’ll typically make some sort of bread. (Search the bottom of the webpage for “epi”, “focaccia” or “fougasse” for some examples.) This year it was a festive herbed focaccia created using a room-temperature overnight poolish as the base:

One day ahead I started the poolish: 800 grams of bread flour. 800 grams cool water. A few grains of Instant (not fast-acting) Dry Yeast, about 1/16 teaspoon. Mix thoroughly, cover tightly, and let sit on the counter overnight.

The next steps need to start at least 6-8 hours before consumption. Most of it is hands-off, but all up it comes out to over four hours of preparation + cooling.

In the bowl of a stand mixer combine 200 grams of bread flour, 2 teaspoons of Instant Dry Yeast, 30 grams olive oil, 20 grams kosher salt. Mix that briefly then add the poolish and mix on low speed for 8 minutes. Cover.

The total baker’s percentage formula comes out to 1000g flour, 800 grams water (80% hydration), 30 grams olive oil (3% of the flour weight), 20 grams kosher salt (2% of the flour weight), yeast.

Bulk rise until doubled in volume – this will take 1 – 2+ hours depending upon the temperature of the house.

Once doubled transfer the dough to a parchment-lined-and-oiled 18 x 13 sheet tray.

Lightly coat the top of the dough with olive oil.

Using your fingers, poke the dough all over down to the base.

Sprinkle on fresh herbs of your choice. I used rosemary and thyme from our raised garden beds. Which were buried under snow, so that took a couple of extra minutes to pick through for good stuff.

Cover the dough and start the oven preheating to 450F.

Let rise one hour. Sprinkle the dough with flakey (Maldon’s) salt.

Bake for 25-35 minutes or until the internal temperature is at least 200F and the bread is pleasantly browned.

Another cell phone pic taken at the event. I cut it into squares to make self-serving easy.

Notes:

I accidently let the bulk rise much more than double. Between that and the starter poolish the dough was extremely loose and extensible. I sort of had to wrestle it into shape using a generous amount of oil to keep it from sticking to everything. Given a more correct rise time the dough should have been much more manageable.

I liked the festive appearance and the focaccia got nice feedback. I can see making this one again, though I think I may use a biga next time with the idea that it may make the dough more manageable in the shaping stage.

Bonus No Knead pic:

Pizza Pinwheels, And Other Kitchen Notes From The Week

The weather has been unusually warm so the arugula decided it was time to bolt. We enjoy arugula on pizzas and in salads. Friday night was a pizza / flatbread with blue cheese, arugula, pine nuts, and thinly sliced steak. What I thought was more interesting was Monday’s Pizza Pinwheels:

Pizza pinwheels with finely chopped pepperoni, shredded mozzarella, and minced arugula

We served these with a red sauce made from last year’s tomatoes. The dough recipe is very easy:

300 grams AP flour, 50 grams greek honey yogurt, 165 grams water, 6 grams kosher salt, and 1 tsp instant yeast. Let the dough rise for an hour and do one or two stretch and folds (optional). Let the dough rise for another two hours. Preheat the oven to 375F. Roll the dough out thinly into a rectangle about 12″ x 8″. Sprinkle on chopped pepperoni, shredded mozzarella, and any other finely chopped herbs/aromatics that you like. (Don’t go overboard on fillings because it still needs to be able to roll up. ) Roll up the dough so that you have a tube 12″ long. Cut into 3/4″ to 1″ pieces and place on parchment or a Silpat. Bake for 15-20 minutes rotating the tray halfway through baking.

Continue reading “Pizza Pinwheels, And Other Kitchen Notes From The Week”